Showing posts with label vegetarian. Show all posts

Monday, February 23, 2015

Roasted Sweet Potato Hashbrowns


In a recent staff meeting our icebreaker question was "What is your favorite time of the day?" My answer was breakfast.  While breakfast isn't the same time every day, I am definitely a morning person and a breakfast person.  During the week it is usually something quick like a scrambled egg quesadilla, an easy omelette, or avocado toast.  The weekend are a great time to get just a little more elaborate in breakfast and to use up the week's leftovers.  I had no intention of writing this recipe or blog post until I realized I had too much diced sweet potato for a recipe I made earlier in the week.  I put some of it in a container for the weekend and took stock of some of my other leftovers: half a jar of roasted red peppers, some fresh thyme, and half an onion.  You can certainly replicate this recipe and intentionally purchase these ingredients, but try to be creative with the vegetables and herbs you have in your refrigerator at the end of the week!


This recipe basically just implements the principles of roasting that I wrote about a few months ago.  I like roasting hashbrowns because it require no active cooking time so you can scramble up some eggs, have a cup of coffee, and read the paper while it cooks away.  I had about one diced sweet potato which is enough to share with someone else, but you'll need more than that for brunch guests.


Line a baking sheet with foil and lightly coat with cooking spray to keep the potatoes from sticking (I use olive oil in a Misto aerator).  Put the diced sweet potato, roasted red pepper, and onion on the sheet pan with one clove of crushed garlic.  Season with salt, pepper, and quarter teaspoon each of ground sage, coriander, and cayenne pepper.  Place a few sprigs of thyme on top and coat with olive oil, tossing to combine.  Place on the bottom rack of a 450 degree oven and set a time for ten minutes.  After ten minutes toss the hashbrowns and  cook for an additional ten minutes.  The high heat and the bottom rack will make sure the hashbrowns are crispy and delicious.  When they are done cooking remove the thyme stems (most of the leaves should have fallen off), toss with a little bit more salt, and serve.


Roasted Sweet Potato Hashbrowns

Ingredients

  • 1 diced sweet potato
  • 1/4 cup diced roasted red peppers
  • 1/4 cup diced onion
  • 1 clove garlic, crushed
  • 5-7 sprigs fresh thyme
  • 1/4 tsp. ground sage
  • 1/4 tsp. coriander
  • 1/4 tsp. cayenne pepper
  • salt and black pepper, to taste
  • 2 tbsp. olive pol

Instructions

  1. Preheat over to 450 degrees
  2. Dice potatoes, red peppers, onion, or other vegetables
  3. Place vegetables on a greased sheet pan and season with herbs and spices.  Add olive oil and toss to combine
  4. Roast on the bottom rack of the over for ten minutes, toss vegetables, and cook for an additional ten minutes

Tuesday, February 3, 2015

Quick Dinner: Farro, Arugula, and Grilled Fennel Salad


I am not in the least it ashamed to admit that I devoured this salad in heaping, sloppy, arugula-falling-out-of-my-mouth gulps.  The only change I would make is doubling the recipe so I could have more leftovers (this yields about two servings).  This all started with a delicious, but unsatisfying salad recipe I tried in the fall semester.  It was arugula, orange segments, thinly sliced red onion, and shaved raw fennel. The flavor was incredible, but even copious amounts left me still feeling hungry.  This salad takes those delicious salad elements and makes them something much more satisfying.  All of that plus it's done in about thirty minutes and is a great protein packed meal to make when "just a few more emails" becomes two extra hours in the office.

Start by cooking the farro.  Farro is a grain that is both delicious and super high in protein, which is part of the reason it doesn't leave you feeling hungry.  I use Trader Joe's Ten-Minute Farro because it cooks in fifteen minutes.  I don't understand the name either.  Bring one cup of farro and two cups of broth or salted water to a boil and simmer for 10-15 minutes until the water is mostly absorbed.


While the farro is cooking make the dressing.  I like to make dressing in a mason jar because it is easy to seal and shake up instead of having to wash a whisk and you can store leftover dressing in it.  Squeeze half of an orange into the mason jar and add 1/4 cup of chives, one crushed garlic clove, a tablespoon of dijon mustard, half a cup of olive oil and salt and pepper.  Seal the jar and shake it vigorously until the dressing is completely combined.  Taste for seasoning and add additional salt and pepper if necessary.


Finely dice about a quarter of a large red onion and slice half a head of fennel.  Heat your grill or grill pan to high.  The goal is to have a short and quick cooking time for the fennel so it is nicely charred and caramelized, but not cooked through entirely.  If you don't have a grill pan cook the fennel quickly under the broiler in your oven.  Coat the grill in olive oil and season the fennel with salt and pepper before grilling until nicely charred, about four minutes.


When the farro is done (it should be al dente - softened, but with some bite) drain and additional liquid and put in a bowl.  Add about half of the dressing and stir to combine.  Place in the refrigerator to cool slightly - the farro should not be so hot that it wilts the arugula.  While the farro cools (about ten minutes) chop the grilled fennel into half-inch cubes.  When the farro has cooled add the red onion, fennel, and two or three handfulls of arugula (about two cups).  Add a little bit more dressing to coat the vegetables and toss to combine.


Farro, Arugula, and Grilled Fennel Salad

Ingredients
For the Dressing
  • 1/4 cup of orange juice (about half an orange)
  • 1/2 cup olive oil
  • 1 clove of garlic, crushed
  • 1/4 cup chopped chives
  • 1 tb. dijon mustard
  • salt and pepper
For the Salad
  • 1 cup of farro, uncooked
  • 2 cups of broth, or water
  • 2 cups arugula
  • 1/2 bulb of fennel
  • 1/4 large red onion

Instructions
  1. Bring 1 cup of farro and 2 cups of water to a boil and simmer for 10-15 minutes
  2. While fennel cooks combine all dressing ingredients and whisk together (or shake vigorously in a mason jar)
  3. Slice fennel and finely dice red onion
  4. Heat an oiled grill pan and season fennel with salt and pepper.  Grill fennel until charred, but not cooked through, about four minutes
  5. Chop fennel into 1/2 inch cubes
  6. Combine cooked farro with half of dressing and cool for 10 minutes in the refrigerator 
  7. When farro has cooled add arugula,  fennel, and red onion with a few more tablespoons of dressing and toss to combine.

Monday, January 26, 2015

Lentil Soup


The end of the semester, winter break, and my comprehensive exams threw me for a bit of a loop regarding the blog, but I'm happy to say I'm back on a regular posting schedule with recipes planned for the next three weeks!  I'm so excited to start off with my mother's recipe for lentil soup.  When I told my roommate I had bought lentils to make this she said, "Why did you buy lentils? You have some already!" It's true, I did have red lentils in the cupboard, but I needed green lentils for this dish.  We're pretty serious about our lentil love in this apartment.  That love is incredibly justified - lentils are one of the most protein packed legumes and a great source of fiber in addition to being delicious and texturally interesting.  This soup is my version of winter comfort food and brings back a lot of strong memories from my childhood.  While this isn't necessarily a quick cooking dish, the active prep time is minimal, so it's great to make when you need to do some chores around the house for the hour that it simmers away.


Start by sautéing half a large onion and grating one medium sized carrot.  Season the vegetables liberally with salt and pepper, and season again when you add the lentils to the pot.  This soup gets its flavor from the vegetables, so be generous with salt to make sure it is a well seasoned soup.  Add the lentils to the pan and stir for a few moments until the lentils are shiny and coated in oil.  Then add four cups of water and one beef bullion cube to the pot and bring to a boil.  Let the lentils simmer partially covered for one hour, stirring occasionally.


My personal favorite way to eat lentils is spooned over elbow macaroni with a little drizzle of olive oil and grated parmesan cheese.  This soup is also great over rice (my mom's favorite) or by itself.


Lentil Soup

Ingredients
  • 1 cup green lentils
  • 1/2 large yellow onion
  • 1 medium carrot
  • 1 beef bullion cube
  • 4 cups of water
  • Salt and pepper
Instructions
  1. Dice onion and shred carrot on the small holes of your box grater
  2. Coat the bottom of a pot with olive oil and bring to medium heat
  3. Saute vegetables until cooked through and add one cup of lentils, stir to combine
  4. Add four cups of water and one beef bullion cube and bring to a boil
  5. Lower heat to a simmer and cook partially covered for one hour, stirring occasionally
  6. Serve alone, or with small pasta or rice

Thursday, November 13, 2014

Foundations Series: Roasting Part I


I'm excited to be kicking off my Foundations Series with a technique that I use almost weekly - roasting!  This edition will focus on roasting vegetables and Part II will be about roasting a chicken.  I used asparagus as an example, but potatoes would be a classic application of this technique.  I also love to roast squash, mushrooms, sweet potatoes, and fennel.  Roasting is a great way to add flavor to your vegetables because they become brown, carmelized  and full of flavor.  And as our friend Anne Burrell would remind us - brown food is tasty food.

The method is quite simple.  Crank your oven up to 450 degrees while you prep the vegetables.  All of the vegetables should be approximately the same size.  Asparagus can remain whole, but vegetables like mushrooms and potatoes should be halved, quartered, or largely chopped to be about the same size.  When roasting potatoes I particularly enjoy using new or fingerling potatoes since they are already small and have a deliciously tender skin.  For most things I like a larger size for roasting, but I will sometimes roast a small dice of sweet potatoes for a lovely sweet potato hash brown.


Let's discuss seasoning for a moment.  At the most basic level roasting necessitates olive oil, salt, and pepper.  I like to use a flakey sea salt for the flavor of larger crystals when I roast, but plain table salt will work just fine.  Other seasoning can work too.  I like to add cumin, chili powder, and cinnamon to sweet potatoes.  Garlic and herbs are often appropriate for potatoes and mushrooms.  Woody herbs like thyme are rosemary are fine to roast in the oven but more delicate herbs like basil should be tossed with the hot vegetables after roasting.  Lemon zest is also a great ingredient to toss in after roasting - especially with asparagus.  

Once consideration for seasoning have been made toss the vegetable with seasoning, salt, pepper, and olive oil.  Take care to coat the the vegetables with olive oil, but don't put too much on.  You want the pan to be dry enough get a good brown on the vegetables.  Put the foil lined pan of vegetables on the bottom rack of the oven so it is closest to the heating element and cook for 25-30 minutes, flipping halfway through for even browning. (Asparagus might take closer to 20 minutes - keep an eye on them!)

Saturday, September 13, 2014

#SApro Tips: Weekly Menu Planning


"I wish I could cook like you do, but I just don't plan well."

"My biggest challenge is deciding what I want to eat in advance."

"Teach me how to not eat like a toddler!"

These are some phrases I hear a lot, and it seemed to be time to share some tips and tricks on how to make menu planning and your food life a success.  We'll go through the process of menu planning and then use my actual menu from the past week as an example to show how to implement the system and make a grocery list.  Big thanks to my professor, friends and colleagues who contributed to the ideas for this post: Dr. Chris Linder, Tim Mousseau, and  Chandler Thompson (check out their blogs too)!  I hope that you find planning in advance will help you have less stress, reduce food waste, and save money.


The Process

Make it a habit:  I think the most important way to make weekly menu planning a reality is to incorporate it into your weekly ritual.  For me that means I sit down with a cup of tea and Pinterest (you can follow me on Pinterest here) every Sunday morning to create my list.  Some weeks I'll do this on Saturday if my Sunday plans prohibit me from going shopping, but it's almost always a Sunday endeavor.  Pick whatever day works best for you and stick with it.

Figure out your formula: There's no prefect formula and this will be different for everyone depending on your appetite and the size of your household unit.  I'll share what works for me and offer some amendments for you to try to have enough food for your needs.  Most people who know me know that I'm all about moderation; I generally eat pretty healthy and I'm also not too concerned with things like calories and carbs.  Especially carbs, this Italian guy loves carbs.  My rule of thumb is to have at least one vegetable with every meal, including breakfast.  With that in mind, I cook four meals a week which is enough for dinner and leftover to bring to work for lunch.  I always have pasta once a week (a self-imposed restriction because I could eat pasta every day) and one meat-free meal.  Since I don't buy anything additional for lunch this could be an easy way to make the same four meal system work in your multi-person home.  Play around with the proportions until you find what works for you.

Check your calendar:  This step is especially important for my student affairs colleagues.  With all of our late nights, programs, and after-hours meetings we need to be cognizant of what our time limitations are.  I know that on Tuesdays and Thursdays I don't get home until around 7 because of meetings for the organization that I advise so those evening have to be quick and easy dinners that don't require a lot of prep.  On Wednesday nights I have an evening class that doesn't end until 8pm, so Wednesdays are always a night for leftovers.  For the extra-busy weeks, like Welcome Week, where I have an event every evening I switch up the plan and cook a couple of big things on Sunday that will last all week. For those weeks I'll do something like a big batch of chicken enchiladas and a sausage and superfood hash.

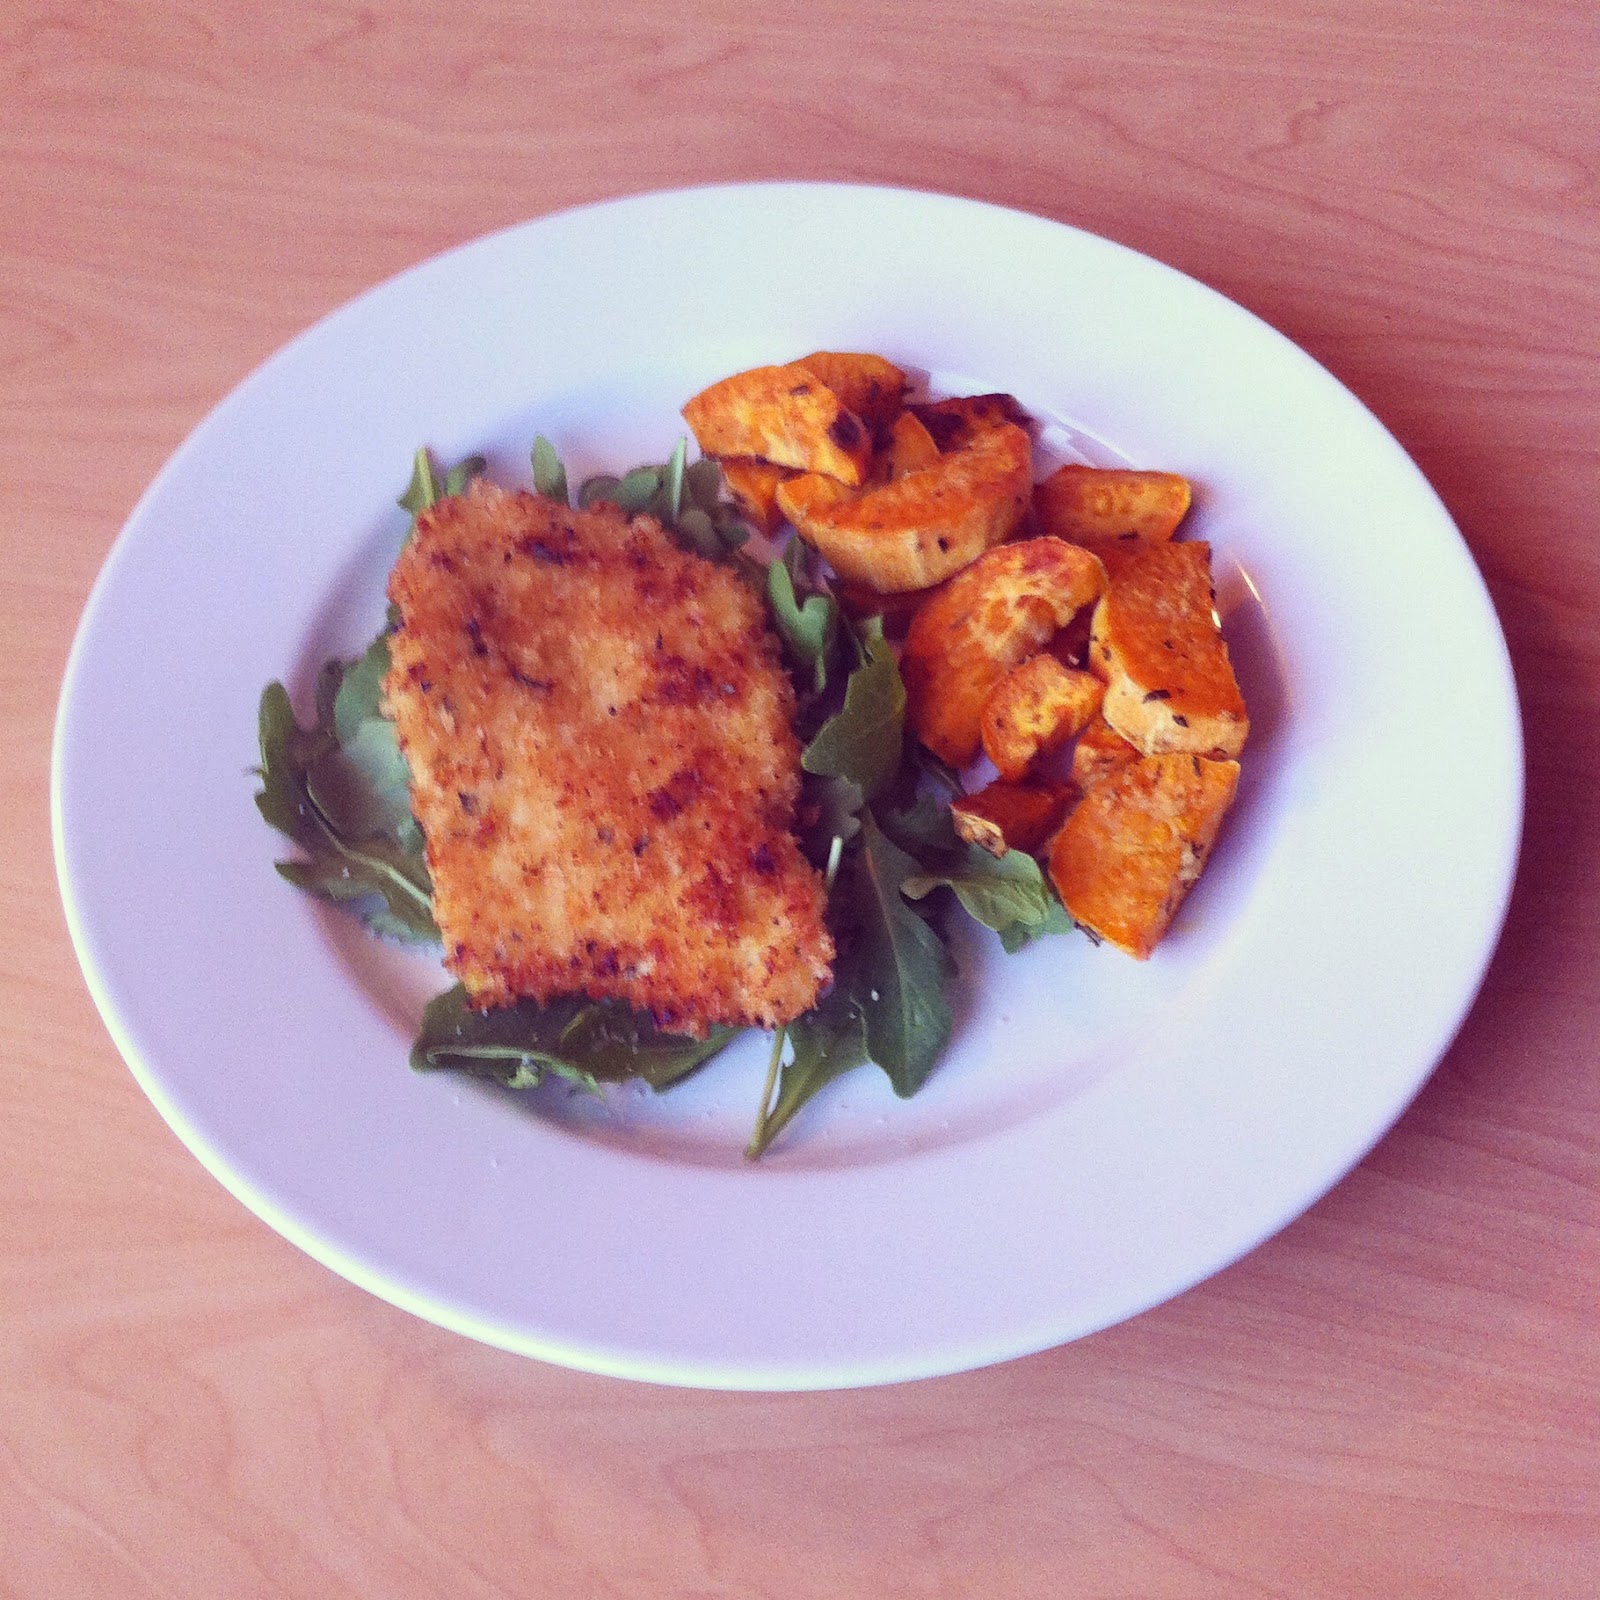
Utilize leftovers: Now that you're ready to start making a menu and list, take stock of things that are left over from last week.  I always seem to have leftover tortillas and fresh herbs.  This week I'll use the leftover tortillas to make egg and arugula quesadillas for breakfast, the leftover rosemary for the panko crusted chicken and roasted sweet potatoes, and the leftover chives for kotlety.  If you use Pinterest you can search by ingredient if you need ideas for what to do with something leftover.  You can also search "just my pins" as a way to cull the results down to things you had already shown interest in.

Look for overlapping ingredients: Similar to repurposing leftover ingredients, looking for ingredients that overlap throughout recipes is a good way to cut costs and reduce waste.  I make a point to do this whenever I'm buying bagged greens like arugula, spinach, or kale because any leftovers are unlikely to remain fresh into a second week of cooking.  This week arugula is becoming a big overlap player as a filling for my breakfast quesadillas, a bed for my panko crusted chicken, and a side salad for my kotlety.  The panko breadcrumbs will do double duty as a coating for the chicken and a filler in the kotlety.  Lemon zest will be used in the chicken coating and the juice from that lemon will be used to make the salad dressing.

Pick a splurge item: Do something good for your emotional health each week and pick a splurge item.  This could be something luxe like prosciutto, a fancy cheese, or an expensive cut of meat or something downright comforting like a frozen pizza or boxed macaroni and cheese.  Either way I think it's important to incorporate some little food items that make you happy as long as you do so in moderation.  This week I got an awesome frozen pizza from Trader Joe's, the Tarte d'Champigon (not as fancy as it sounds), and had absolutely no regrets about it. Self care, y'all!

The Menu
  • Breakfast all week: Arugula and Egg Quesadilla 
  • Sunday: Lemon Rosemary Chicken (from The Country Chic Cottage) and Roasted Sweet Potatoes


  • Tuesday: Chicken and Asparagus Stir Fry (from Skinny Taste)

  • Wednesday: Leftovers
  • Thursday: Pasta with Roasted Cauliflower, Broccoli, and Chickpeas (from Buzzfeed)


The List(s)

Each week I go to both Kroger and Trader Joe's.  I love Trader Joe's and find that some produce items like mushrooms and bagged greens are much cheaper there (organic spinach for $1.99, what?!).  Other TJ's items are simply much better quality.  I get everything else from Kroger.  The two stores are across the the street from each other so going to both is not much of a hassle, but all of these items would be available at your grocery store.  Please note that these lists are not exhaustive of everything you would need to make all of the dishes for this week.  The lists do not include things like rice, pasta, oil, spices, and seasonings that I always have in the house so take stock before you go shopping!
  • Trader Joe's
    • 1 head fresh broccoli
    • 1 head fresh cauliflower
    • 1 lemon
    • 1 bag arugula
    • 1 package white button mushrooms
    • 4 apples (for snacks)
    • 3 sweet potatoes
    • panko breadcrumbs
    • frozen pizza
    • smoked gouda cheese (for snacks)
  • Kroger
    • 1 lb. chicken cutlets
    • 1 lb. chicken tenders
    • 1 lb. ground turkey
    • 1 bunch asparagus
    • 1 inch fresh ginger
    • 1 lb. pasta
    • 1 can chickpeas
    • 1/2 dozen eggs
    • 1 bag shredded Mexican cheese blend
I hope this guide helps you to plan your weekly meals and run a more efficient kitchen.  Let me know if you have any questions or other tips and tricks in the comments!

Friday, August 8, 2014

Fried Artichoke Salad and Summer Internship Reflection


I just got back from a wonderful summer in St. Louis working with the First Year Center at Washington University in St. Louis.  I loved being at Wash. U. and in St. Louis for the summer and wanted to share this recipe for a great salad I had at Katie's Pizza.

Now it's pretty rare for me to get excited about a salad and I generally don't view salad as the main part of a meal, but this salad is really wonderful and substantial enough to be a complete meal.  Take the time to roast the asparagus ahead of time, preferable to use in another meal during the week.  I always seem to have a few leftover asparagus and this is the perfect place to use them.  Look for thin asparagus for this application and save thicker asparagus for stir fries and purees.

Lightly dredge halved artichoke hearts in the seasoned flour and fry to a golden brown in oil.  I used canned artichoke hearts, but you could also use fresh or frozen.  While the artichokes fry arrange greens (I used a spring mix), asparagus, crumbles of goat cheese, and pistachios.  Top the salad with fried artichokes and drizzle with balsamic vinegar and olive oil.  You could make a real dressing by whisking it all together, but I was feeling artistic/lazy and just drizzled the dressing over the salad and it was just fine.

Fried Artichoke Salad


Ingredients (per salad)
  • 2 artichoke hearts, halved
  • flour
  • 4-5 spears of roasted asparagus
  • 2 cups of mixed greens
  • 1 oz. goat cheese
  • 2 tbsp. pistachios
  • 1 tbsp. balsamic vinegar
  • 2 tbsp. olive oil

Instructions
  1. Lightly dredge halved artichokes in flour seasoned with salt and pepper
  2. Fry artichokes to a golden brown in oil
  3. While artichokes fry, add salad greens, asparagus, pistachios and goat cheese to bowl
  4. When artichokes are golden brown transfer them to a paper towel lined plate and allow them to drain before transferring to the salad
  5. Drizzle salad with oil and vinegar and serve immediately.

Monday, May 12, 2014

Sweet Potato Fries


I've talked about it before, but I really love sweet potatoes.  They're so rich in nutrients, and now that I've got over the sugar shock of their Thanksgiving preparation sweet potatoes make frequent appearances on my table.  I love baking these fries with a lot of seasoning combinations, but this blend of cumin, paprika, and cinnamon is one of my favorites.

You have to take a couple of steps to make these fries crispy.  The first is cutting them fairly thinly.  More surface area means more crispiness.  I like to look for longer, less squat sweet potatoes when I make fries.  Make sure you're using a sharp knife for this - cutting into a raw sweet potato can be difficult and a blunt knife can make it dangerous.  I like to skin the sweet potatoes before cutting them, but that's a personal preference.  Scrub them very well if you decide not to skin them.


Once you've sliced the potatoes submerge them in a bowl of cold water for at least an hour. This helps to remove some of the starch, which is another way to make them crispy.  When you remove them from the water rise them off to remove the any additional starch and pat them completely dry.  Lay them on a foil lined sheet pan, and make sure the potatoes have enough room to be spread in a single layer.  Use two pans if necessary.


Bake the fries at 450 degrees for 20-30 minutes on the lowest rack of the oven.  Flip them halfway through the cooking time to ensure maximum crisp.

If you have any leftovers let them cool completely before you store them so they don't get soggy, and reheat them in the oven.


Sweet Potato Fries

Ingredients

  • 3 medium sweet potatoes
  • 2 tbsp. olive oil
  • 1/2 tsp. cumin
  • 1/4 tsp. paprika
  • 1/4 tsp. cinnamon
  • Salt and Pepper

Instructions

  1. Preheat oven to 450 degrees
  2. Slice sweet potatoes in half and slice lengthwise into fries
  3. Soak potatoes in water for at least 1 hour
  4. Drain and rinse potatoes and dry them completely
  5. Place potatoes on a foil lined sheet pan and coat with oil, spices, and salt and pepper
  6. Bake potatoes for 20-30 minutes, and flip halfway through cooking time

Saturday, May 3, 2014

Classic Macaroni Salad


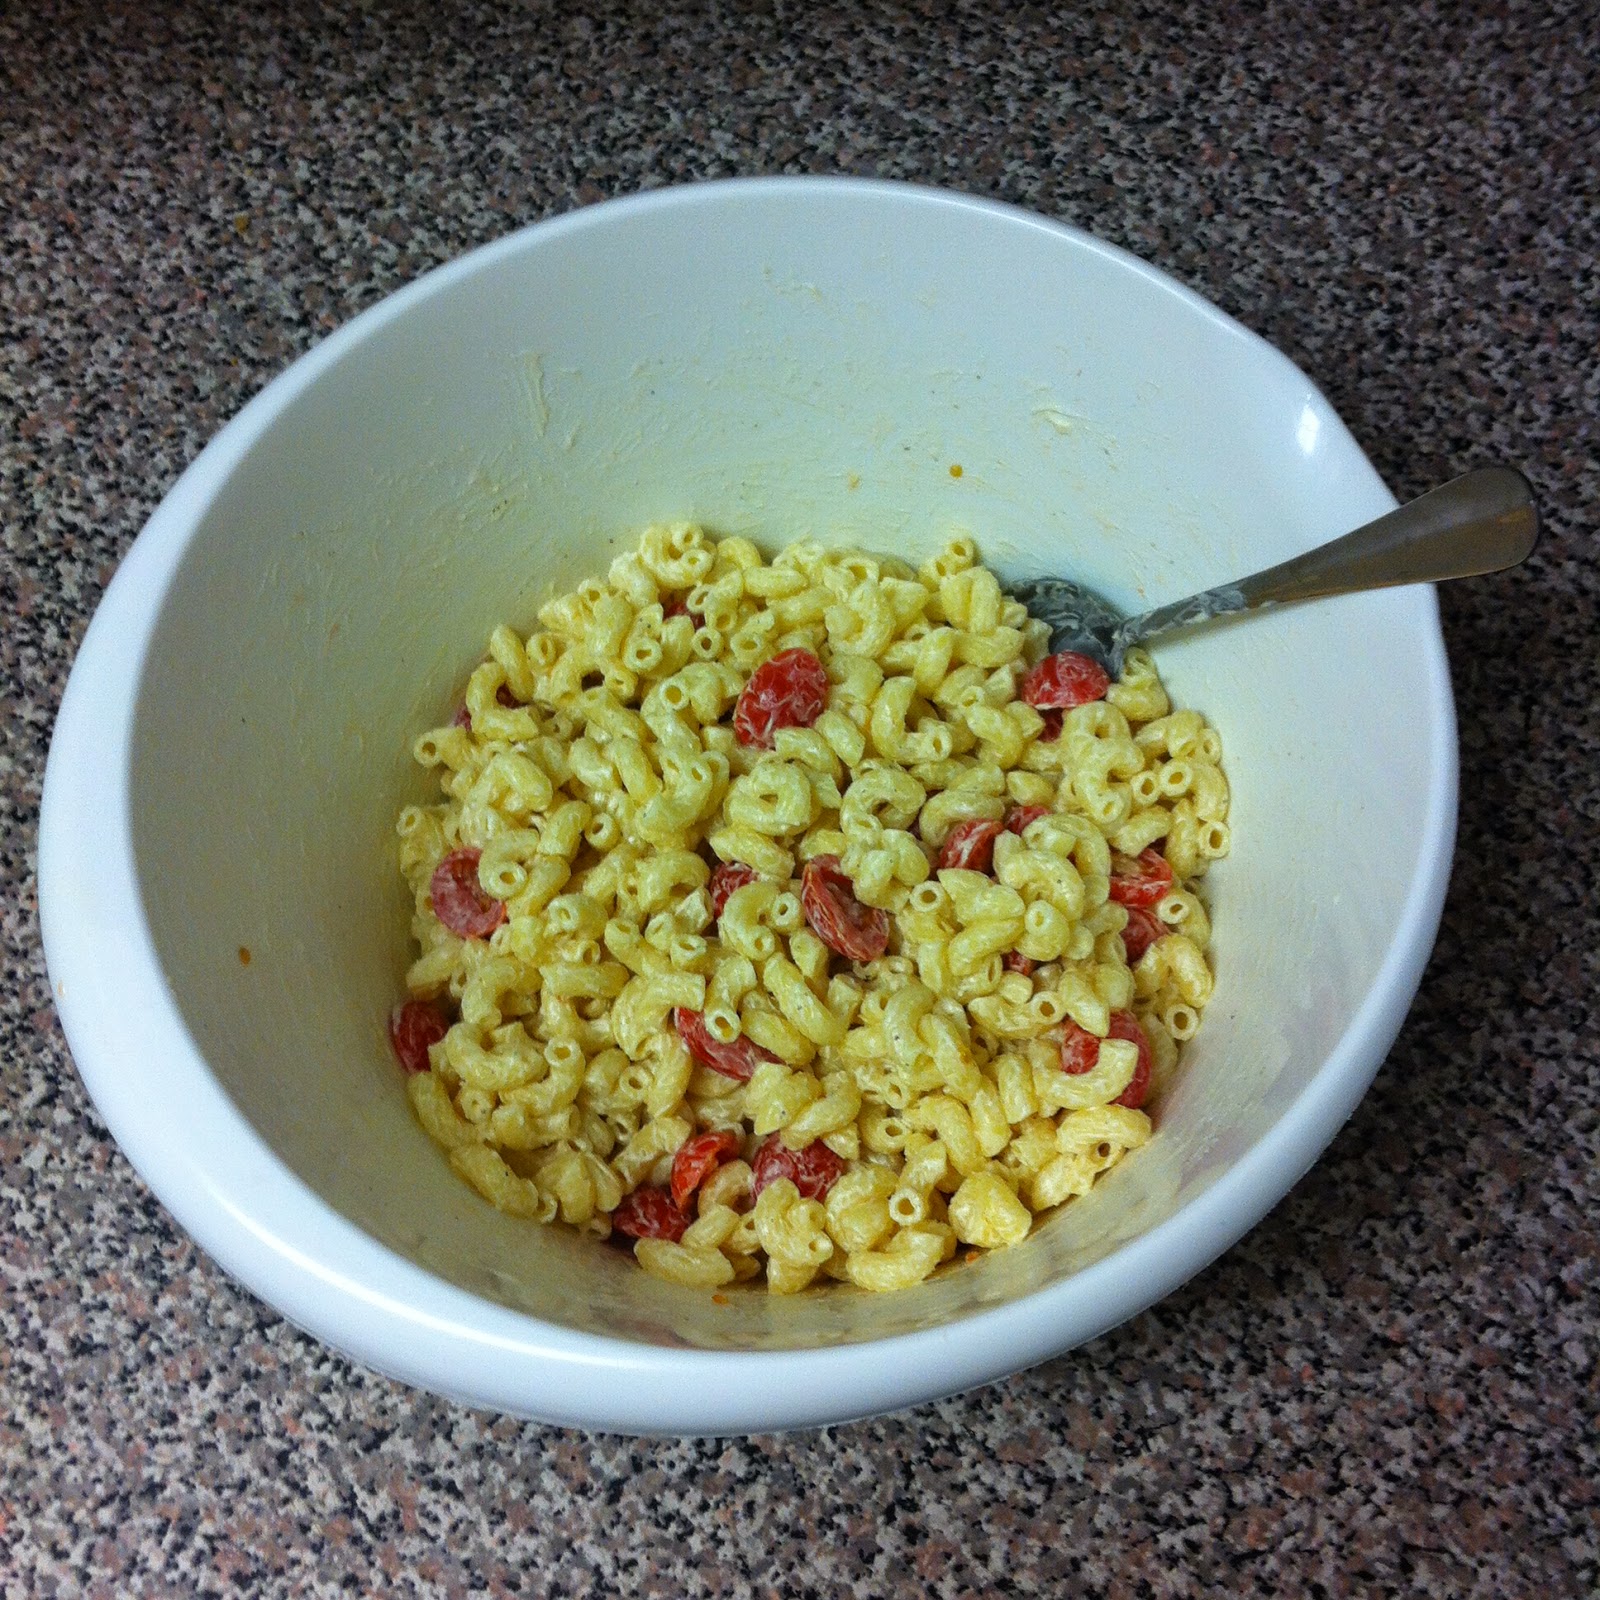
I just finished my last final, so it is officially the summer!  It's also the time of year when those end of the year potlucks start to pop up all over Student Affairs, so I think the perfect marriage of summer and potluck is my mom's macaroni salad.

When I was writing this post I kept thinking of ways to "improve" this recipe.  Grated onion, I thought, would be a great addition to my mom's recipe and then I realized that the point of this recipe was to be easy and deliciously simple.  As a cook and a blogger it was tempting to dress this recipe up, but it didn't need any extraneous ingredients to shine.  With that in mind I cut out all of the extras and made it just like my mom does.


First bring a large pot of salted water to a boil and cook half a pound of elbow noodles until they are al dente.  Drain the cooked pasta and add to a bowl with 1/4 cup of white vinegar.  Stir occasionally while the pasta cools slightly, and once it is moderately cool, cover loosely with parchment or wax paper and put in the refrigerator to finish cooling.  Don't put tin foil or plastic wrap over it - you don't want to stop heat from escaping and cook the pasta more.

While the pasta is cooling place one egg in a small saucepan and cover with cold water.  Bring the saucepan to a boil and set a time for 15 minutes. After 15 minutes, run cold water over the saucepan and let the egg sit in the cook water for a few minutes.  Crack and peel the egg while it is still lukewarm and place it in the refrigerator to cool.  My mom doesn't always add the hard boiled eggs, so feel free to omit them if you're just not a fan.  I promise it will still taste great!


After the pasta and egg have cooled for at least an hour, remove them from the refrigerator. Add the very finely diced hard boiled eggs, halved grape tomatoes, mayo, salt and pepper to the pasta and stir to combine.  The amount of mayonnaise is really about personal preference, so I would add 3/4 of a cup first and then see if it needs more.  Taste to check the seasoning and add more salt or pepper if necessary.  Refrigerate until you're ready to enjoy!

Classic Macaroni Salad

Ingredients
  • 1/2 lb. of elbow macaroni
  • 1/4 cup white vinegar
  • 2 cups grape tomatoes
  • 1 egg
  • 3/4 - 1 cup mayonnaise
  • Salt and Pepper

Instructions
  1. Bring a large pot of salted water to a boil and cook pasta until al dente
  2. Drain the cooked pasta and coat with 1/4 cup of white vinegar, stirring occasionally until it is cool enough to refrigerate
  3. Put one egg in a small saucepan and cover with water.  Bring to a boil and cook for 15 minutes
  4. After 15 minutes, run cold water over the saucepan and egg, and allow to cool for 5 minutes in the lukewarm water.  Remove and peel the shell from the egg, refrigerate
  5. After the pasta and hard-boiled egg have cooled for at least an hour, very finely dice the egg, slice grape tomatoes lengthwise and add to pasta
  6. Add 3/4 cup of mayonnaise to the pasta and season with salt and pepper, stir.  If the pasta seems to dry add the final 1/4 cup of mayonnaise
  7. Refrigerate before serving

Tuesday, April 1, 2014

Strawberry and Cucumber Salad


My assistantship supervisor, Liz, just left UGA for a fantastic new adventure.  While we're all sad to see her go, we definitely enjoyed benefiting from her cleaning out her apartment kitchen to move!  She gave me this lovely set of black cherry balsamic vinegar and persian lime olive oil from her home state of Maine.  The first thing I thought when I saw the vinegar was that I needed to pair it with strawberries.  This is a refreshing and light spring and summer salad that will be delicious with either black cherry or regular balsamic vinegar.


First I peeled the cucumber, sliced it lengthwise, and used a spoon to scrape out the seeds. Then I sliced the cucumber into little crescents, quartered the strawberries, and julienned the fresh mint.  I combined all of those ingredients in a bowl with balsamic vinegar, honey, and a little bit of salt.  You can serve it immediately, or let it marinade for a little while.  


After I put it together I realized it was a perfect salad to honor Liz since her favorite colors are pink and green!  The red strawberries are close enough, right?  Thanks for the wonderful gift, Liz, and good luck in the future!

Strawberry and Cucumber Salad

Ingredients

  • 16 oz. strawberries
  • 1 small cucumber
  • 2 tbsp. fresh mint
  • 2 tbsp. balsamic vinegar
  • 1 tbsp. honey
  • 1/4 tsp. salt

Instructions
  1. Peel skin off the cucumber, slice it lengthwise and use a spoon to scrape out the seeds.  Then chop the cucumber into crescents.
  2. Quarter or halve the strawberries, depending on how large they are
  3. Julienne the mint leaves
  4. Combine all ingredients in a bowl and mix

Wednesday, March 19, 2014

Quick Dinner: Stir Fry


Stir fry is a great application for a quick dinner, it took me about 30 minutes to prepare.  You're able to get a bunch of vegetables into one meal, and often can use up vegetables you have leftover from other recipes.  Most of the time you invest in making a stir fry is in preparing those vegetables so doing that in advance (like on the weekend) is a great way to make this a truly quick dinner when you get home late from work.


The key to making a stir fry come together quickly and without stress is having everything you need prepared before you start cooking.  The French phrase mise en place means putting in place, and thats is the technique we'll utilize here.  As you prepare each ingredient place it in a little pile on your cutting board or in a bowl so it will be ready when you start cooking.  First combine the soy sauce, sriracha, and brown sugar in a bowl, stirring occasionally throughout the cooking process to make sure the sugar dissolves   Chop the bok choy, slice the mushrooms, grate the carrot, ginger, and garlic.  Slice the green onions and reserve some of the dark green pieces for later on in the preparation.  


Heat vegetable oil in a large skillet or wok on medium-high heat.  Once the oil is hot, add the garlic, ginger, and green onions and sauté them for a minute to create your flavor base.  After a minute add the mushrooms and carrots to the pan and sauté until the mushrooms are cooked through, about seven minutes.  The mushrooms will take the longest to cook through, once they have add the chopped bok choy and allow it to wilt.


After the bok choy has wilted, add the sauce udon noodles to the pan.  Typically these come fully cooked, I like to heat them in the microwave before adding them to the pan so they don't stick together.  Let the sauce and noodle cook with the vegetables together for three or four minutes until the sauce thickens.  Before serving add the reserved dark green onions.


Feel free to add any vegetables you like.  I didn't grow up in a meat and potatoes type of family, so I don't mind this vegetarian dinner.  If you do want to add chicken, pork, or steak (which I think would be particularly good with this sauce and vegetable combination) cook it in the beginning of the preparation and remove it from the pan until the end so it doesn't overcook.


Stir Fry

Ingredients

  • 3/4 cup of soy sauce
  • 2 tablespoons of brown sugar
  • 2 tablespoons of sriracha 
  • 3 baby bok choy
  • 1 lb. white button mushrooms
  • 1 medium carrot
  • 4 green onions, some dark green reserved
  • 1 inch of fresh ginger, grated
  • 2 large cloves of garlic
  • 1 14 oz. package of udon noodles


Instructions

  1. Combine soy sauce, brown sugar, and sriracha in a small bowl, stirring occasionally to ensure the sugar is dissolved
  2. Chop bok choy and green onions, slice mushrooms, grate carrots, ginger, and garlic. 
  3. Heat vegetable oil in a large skillet or wok over medium-high heat
  4. Sauté garlic, ginger, and green onions for one minute
  5. Add mushroom and carrots, cook for seven minutes, or until mushrooms are cooked through
  6. Add bok choy and cook until wilted
  7. Next add the sauce and udon noodles, cook for 3-4 minutes until the sauce has thickened.
  8. Add reserved green onion tops and serve