Showing posts with label turkey. Show all posts

Thursday, December 11, 2014

Foundations Series: Roasting Part II


You probably won't be surprised to learn that I really love Ina Garten.  My love for her is so deep that the students I worked with over the summer included "You don't know who Ina Garten is?!?!?!?" on a list of funny Michael quotes from the summer.  Here's a quick primer on why I feel so strongly about the Barefoot Contessa.  If you're also a fan you know that Ina makes chicken for her husband Jeffrey when he comes home to the Hamptons from the city each Friday and is truly the Queen of the Roast Chicken.  This recipe is based off a few of her own recipes, primarily her "perfect roast chicken."  Which is, of course, perfect as it is, but is improved by her "kicking it up a notch" trick of adding compound butter underneath the skin.

We should acknowledge from the start that dealing with a whole, raw chicken can be intimidating.  Ina's refrain of "How easy is that?" might not be the most encouraging when you're staring down the back (front?) end of a chicken.  It's messy, and a little icky, but ultimately a roast chicken is a foundational kitchen skill and can be mastered with practice.  Until you master the recipe, chicken can be really forgiving.  In a finals week haze I accidentally roasted this chicken upside down.  It was still delicious and wonderful, and yours will be too!  This recipe is also great for your student affairs schedule; it is a little more time consuming than one of my quick dinners, but the yield from a whole chicken can feed you for the rest of the week.  Repurpose it by making chicken enchiladas, chicken salad, soups, and pastas with the leftover meat.


Let's start with the prep work.  A compound butter is just butter that has been flavored with herbs, fruit, or aromatics.  For this chicken we will mix salt, pepper, rosemary, sage, and thyme with half a stick of room temperature butter.  I like to use a fork to throughly combine the butter and herbs.  Place the butter to the side while you prepare the rest of the chicken.  If you don't have a roasting pan with a rack simply make a spiral with some tin foil and place it at the bottom of a baking dish.  You can also use diced root vegetables (potatoes, carrots, turnips, fennel, etc.) to elevate the chicken.


Remove the giblets from the cavity and save them for gravy.  Pat the chicken dry inside and out to ensure a delicious crispy skin.  Season the inside of the cavity with salt and pepper and stuff it with two halves of a lemon, a quartered yellow onion, eight whole cloves of garlic, and a bunch of thyme and rosemary.  Make sure you do not completely fill the cavity with the aromatics, they should rest inside but not crowd the cavity which would throw off the cooking time.  Next pull the skin on the breast up, and massage the breasts with the compound butter so it is evenly distributed underneath the skin.  Any extra butter can be rubbed on top of the skin.  Place the chicken in a 425 degree oven and roast for 1 and a half hours, or until the juices run clear.


Remove from the oven and let rest for 20-30 minutes.  This resting period is crucial to ensure a juicy bird.  Use this time to make gravy and to sauté some green beans and garlic until they are just cooked and remain crisp.  Avoid the temptation to bring the bird to the table whole - it may be a nice presentation, but carving table side is unwieldy.  I'll defer to the wonderful step by step photography in this Serious Eats article  for carving advice.  This carving method is the best way to ensure everyone gets a piece of what they want.


Roast Chicken
Adapted from Ina Garten

Ingredients
  • 1 5-6 pound whole chicken
  • 1 yellow onion
  • 1 lemon
  • 8 cloves of garlic
  • 1 bunch of thyme
  • 4 tbsp. butter
  • 2 sage leaves, chopped
  • 1/2 tbsp. chopped fresh thyme
  • 1/2 tbsp. chopped fresh rosemary

Instructions
  1. Use a fork to combine chopped herbs, salt, and pepper with room temperature butter and set aside.
  2. Halve lemon, chop onion into quarters, and peel garlic.
  3. Remove chicken from packaging and pat dry.  Stuff cavity with lemons, onion, and garlic, and additional bunch of thyme.
  4. Use your fingers to open space between the skin and breast, massage butter mixture into the space between the skin and breast, rub any leftover butter on the outside of the skin.
  5. Roast at 425 degrees for 1.5 hours, or until juices run clear.
  6. Allow to rest for 20-30 minutes before carving.

Friday, November 21, 2014

Foundations Series: Traditional Gravy


Since the idea for this series first came about I knew that sauces were going to be on the list.  I was unsure what kind of sauce would be first, but with Thanksgiving next week a traditional gravy came right to the top of the list.  Gravy, like salad dressing, is one of those things I refuse to buy from the store.  You probably already have all the ingredients to make gravy in your home already and making it homemade means you're cutting out all of the preservatives and extra sodium that you don't need.  Besides that the taste of homemade gravy will outshine the canned any day!  The other great thing about gravy is that you can cook it in the time your meat needs to rest, and cutting into it before it rests is the real reason your turkey is dry.

Making gravy is not complicated, but it should be done with care.  The gravy I'm making here is the most basic gravy, and I will discuss variations along the way.  In it's purest form gravy is roux + stock and drippings.  I will offer that your gravy can be enhanced by bookending those two components with additional flavor.


In this case we will start by sautéing half of a very finely diced onion over medium-low heat until the begin to turn golden with some thyme, which is both my favorite herb and an excellent compliment to poultry like your Thanksgiving turkey.  Variations: chopped mushrooms are a wonderful addition to gravy (especially beef) celery and carrot (in extreme moderation) could also be added to the onions in this stage.

Once the onions start to become golden we will build a the roux.  A roux is a thickening agent made from equal parts fat and flour.  In this case we will use two tablespoons of butter (one of which is already in the pan with the onions, the second you will add now) and two tablespoons of flour.  Sprinkle the flour in one tablespoon at a time while you whisk.  You can use fat from the meat you've roasted instead of butter for a truly delicious roux as well.  Vigorously whisk the roux and cook it until it begins to take a golden color - be very careful not to let the roux burn.


Slowly add two cups of (warm, but not boiling) stock and drippings to the pan - whisking constantly and maybe taking a bad photo of it.  Whisk constantly until the mixture comes to a low boil and reduce to a simmer while gravy thickens.  Stir periodically as it simmers.  You can use whatever stock accompanies your meat.  Chicken stock will work perfectly fine with turkey, though you can sometimes find turkey stock this time of year.  I would also argue that a well made vegetable broth will heighten the flavor of a gravy.  I particularly like the organic vegetable broth from Trader Joe's because it has a wonderful leek flavor.  To use pan drippings simple drain the roasting pan into a clear, heat-proof container and wait for the fat to rise to the top.  Skim off the fat and combine drippings with stock.

At this point you have a fully fledged gravy, but you can take the opportunity to add some additional flavor to the gravy.  A tablespoon of alcohol (brandy, cognac, sherry, white wine, etc.) would be a lovely addition, likewise a tablespoon of cream.  Fresh herbs like parsley can also come into play here.  In researching this post I discovered that a chopped hard boiled egg is a popular (Southern?) addition to gravy, and while I can't say I'm planning on trying this I can see where they're coming from.  In beef gravy I'm partial to sour cream and dijon mustard stirred in at this point.  This would also be the time to add cooked and finely chopped giblets - a contentious ingredient to be sure.  I'm a fan of giblets because even though they look gross and are stuffed in a bird cavity they are full of flavor and are actually super vitamin rich.  To cook, cover them in water and boil away.  Pull the neck meat from the bone and chop everything finely to add to gravy.  


Special thanks to Pattie for answering the frantic GroupMe message and lending me her gravy boat.  May you all enjoy this gravy with those you care about this Thanksgiving!

Traditional Gravy

Ingredients
  • 1/2 yellow onion
  • 1 tsp. fresh thyme
  • 2 1/2 tbsp. butter
  • 2 tbsp. flour
  • 2 cups chicken (or appropriate meat) stock
Instructions
  1. Finely dice half of a yellow onion
  2. Sautee onion in 1.5 tablespoons of butter over medium-low heat
  3. When onion begins to brown add 1 teaspoon of fresh thyme leaves
  4. Add 1 tablespoon of butter, allow to melt and sprinkle in 2 tablespoons of flour, whisking vigorously
  5. When roux has begun to color, add 2 cups of warm chicken stock, and whisk continuously until mixture comes to a low boil
  6. Reduce to a simmer, season with black pepper, and add any additional flavor components.

Saturday, September 13, 2014

#SApro Tips: Weekly Menu Planning


"I wish I could cook like you do, but I just don't plan well."

"My biggest challenge is deciding what I want to eat in advance."

"Teach me how to not eat like a toddler!"

These are some phrases I hear a lot, and it seemed to be time to share some tips and tricks on how to make menu planning and your food life a success.  We'll go through the process of menu planning and then use my actual menu from the past week as an example to show how to implement the system and make a grocery list.  Big thanks to my professor, friends and colleagues who contributed to the ideas for this post: Dr. Chris Linder, Tim Mousseau, and  Chandler Thompson (check out their blogs too)!  I hope that you find planning in advance will help you have less stress, reduce food waste, and save money.


The Process

Make it a habit:  I think the most important way to make weekly menu planning a reality is to incorporate it into your weekly ritual.  For me that means I sit down with a cup of tea and Pinterest (you can follow me on Pinterest here) every Sunday morning to create my list.  Some weeks I'll do this on Saturday if my Sunday plans prohibit me from going shopping, but it's almost always a Sunday endeavor.  Pick whatever day works best for you and stick with it.

Figure out your formula: There's no prefect formula and this will be different for everyone depending on your appetite and the size of your household unit.  I'll share what works for me and offer some amendments for you to try to have enough food for your needs.  Most people who know me know that I'm all about moderation; I generally eat pretty healthy and I'm also not too concerned with things like calories and carbs.  Especially carbs, this Italian guy loves carbs.  My rule of thumb is to have at least one vegetable with every meal, including breakfast.  With that in mind, I cook four meals a week which is enough for dinner and leftover to bring to work for lunch.  I always have pasta once a week (a self-imposed restriction because I could eat pasta every day) and one meat-free meal.  Since I don't buy anything additional for lunch this could be an easy way to make the same four meal system work in your multi-person home.  Play around with the proportions until you find what works for you.

Check your calendar:  This step is especially important for my student affairs colleagues.  With all of our late nights, programs, and after-hours meetings we need to be cognizant of what our time limitations are.  I know that on Tuesdays and Thursdays I don't get home until around 7 because of meetings for the organization that I advise so those evening have to be quick and easy dinners that don't require a lot of prep.  On Wednesday nights I have an evening class that doesn't end until 8pm, so Wednesdays are always a night for leftovers.  For the extra-busy weeks, like Welcome Week, where I have an event every evening I switch up the plan and cook a couple of big things on Sunday that will last all week. For those weeks I'll do something like a big batch of chicken enchiladas and a sausage and superfood hash.

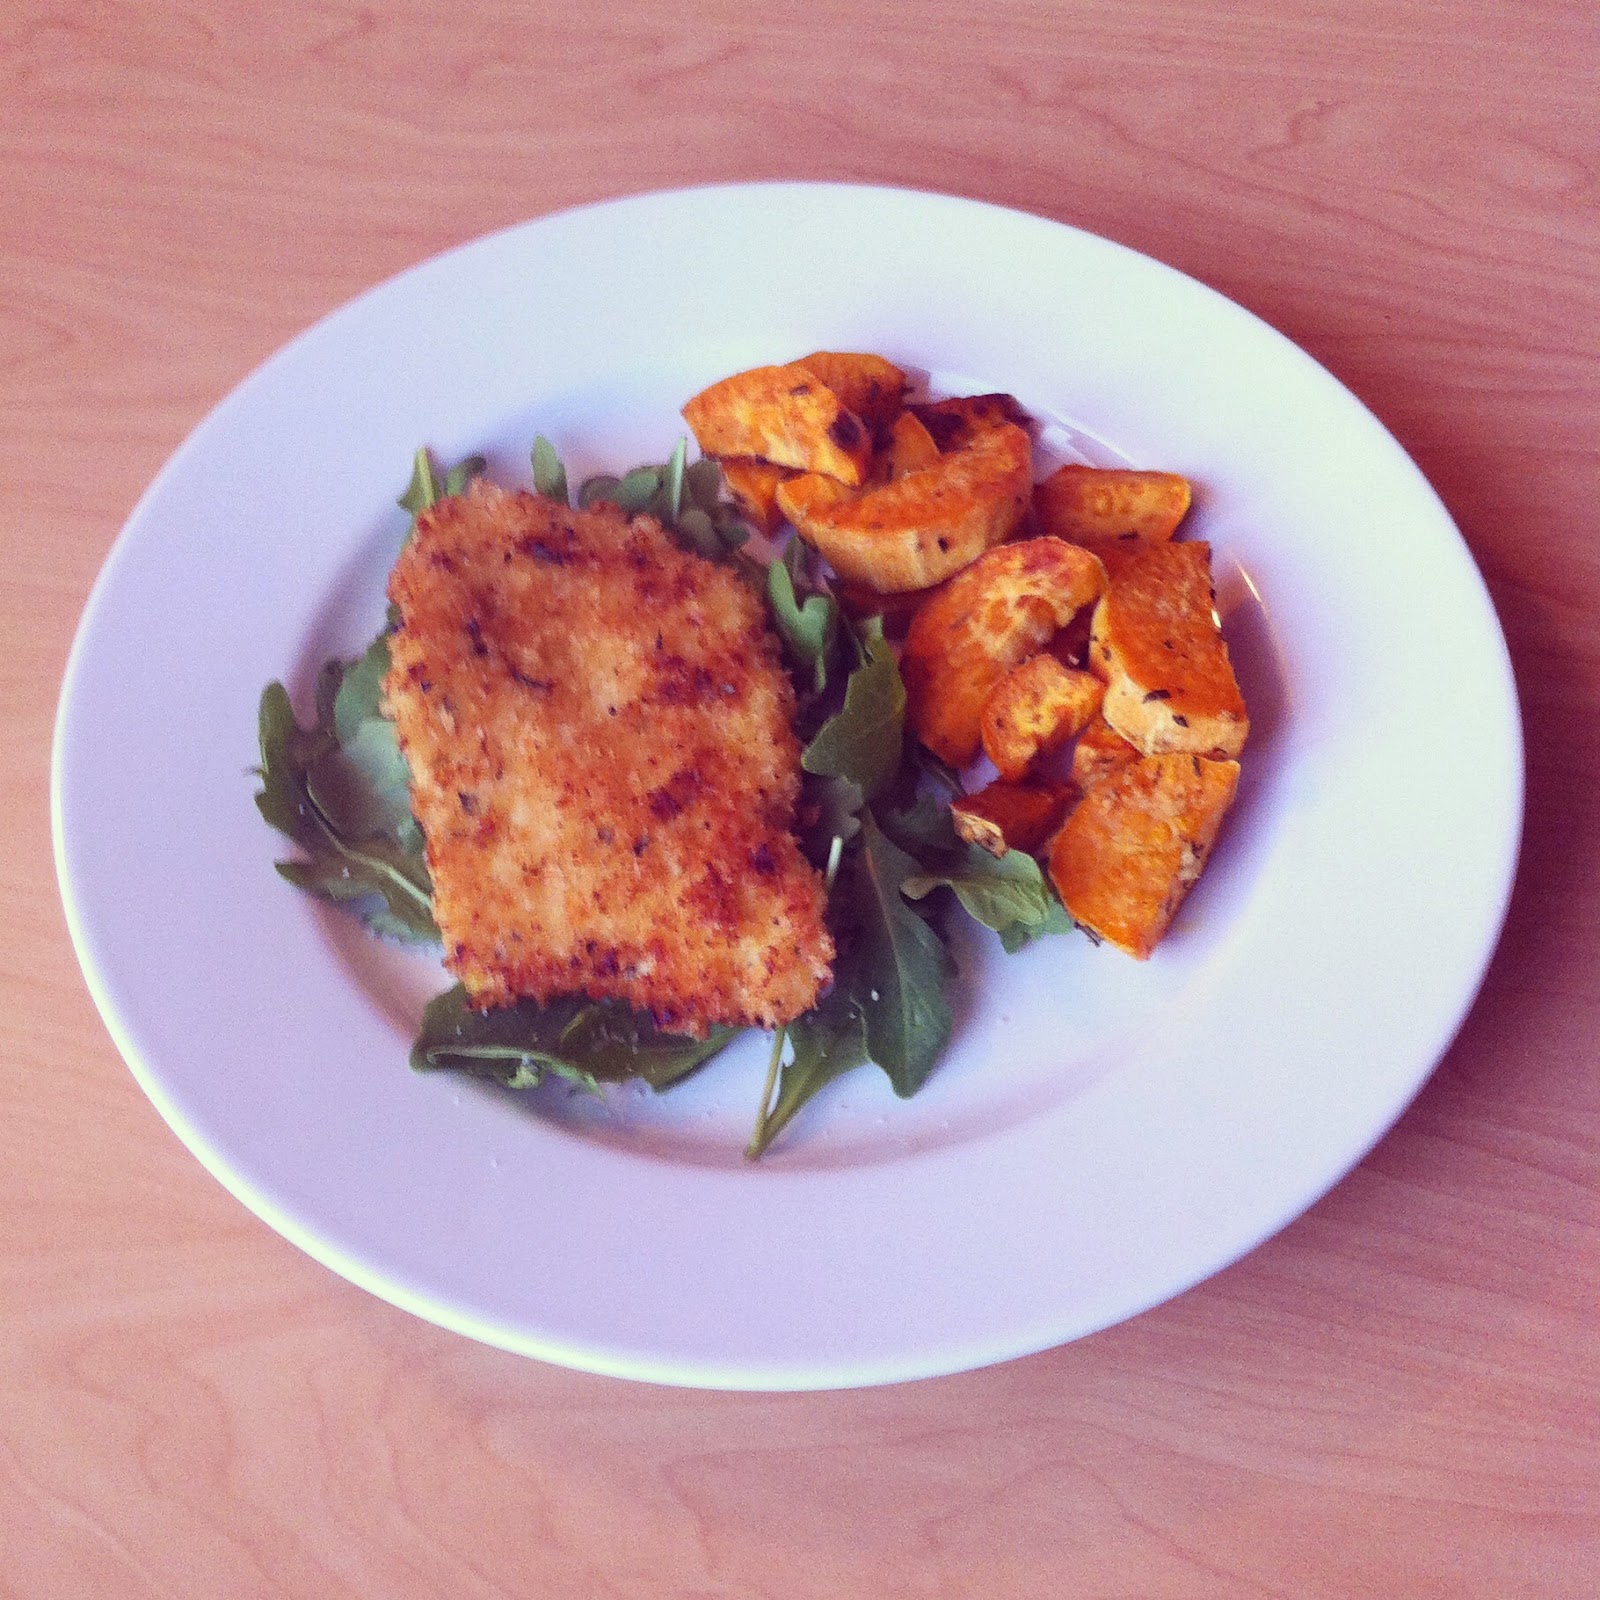
Utilize leftovers: Now that you're ready to start making a menu and list, take stock of things that are left over from last week.  I always seem to have leftover tortillas and fresh herbs.  This week I'll use the leftover tortillas to make egg and arugula quesadillas for breakfast, the leftover rosemary for the panko crusted chicken and roasted sweet potatoes, and the leftover chives for kotlety.  If you use Pinterest you can search by ingredient if you need ideas for what to do with something leftover.  You can also search "just my pins" as a way to cull the results down to things you had already shown interest in.

Look for overlapping ingredients: Similar to repurposing leftover ingredients, looking for ingredients that overlap throughout recipes is a good way to cut costs and reduce waste.  I make a point to do this whenever I'm buying bagged greens like arugula, spinach, or kale because any leftovers are unlikely to remain fresh into a second week of cooking.  This week arugula is becoming a big overlap player as a filling for my breakfast quesadillas, a bed for my panko crusted chicken, and a side salad for my kotlety.  The panko breadcrumbs will do double duty as a coating for the chicken and a filler in the kotlety.  Lemon zest will be used in the chicken coating and the juice from that lemon will be used to make the salad dressing.

Pick a splurge item: Do something good for your emotional health each week and pick a splurge item.  This could be something luxe like prosciutto, a fancy cheese, or an expensive cut of meat or something downright comforting like a frozen pizza or boxed macaroni and cheese.  Either way I think it's important to incorporate some little food items that make you happy as long as you do so in moderation.  This week I got an awesome frozen pizza from Trader Joe's, the Tarte d'Champigon (not as fancy as it sounds), and had absolutely no regrets about it. Self care, y'all!

The Menu
  • Breakfast all week: Arugula and Egg Quesadilla 
  • Sunday: Lemon Rosemary Chicken (from The Country Chic Cottage) and Roasted Sweet Potatoes


  • Tuesday: Chicken and Asparagus Stir Fry (from Skinny Taste)

  • Wednesday: Leftovers
  • Thursday: Pasta with Roasted Cauliflower, Broccoli, and Chickpeas (from Buzzfeed)


The List(s)

Each week I go to both Kroger and Trader Joe's.  I love Trader Joe's and find that some produce items like mushrooms and bagged greens are much cheaper there (organic spinach for $1.99, what?!).  Other TJ's items are simply much better quality.  I get everything else from Kroger.  The two stores are across the the street from each other so going to both is not much of a hassle, but all of these items would be available at your grocery store.  Please note that these lists are not exhaustive of everything you would need to make all of the dishes for this week.  The lists do not include things like rice, pasta, oil, spices, and seasonings that I always have in the house so take stock before you go shopping!
  • Trader Joe's
    • 1 head fresh broccoli
    • 1 head fresh cauliflower
    • 1 lemon
    • 1 bag arugula
    • 1 package white button mushrooms
    • 4 apples (for snacks)
    • 3 sweet potatoes
    • panko breadcrumbs
    • frozen pizza
    • smoked gouda cheese (for snacks)
  • Kroger
    • 1 lb. chicken cutlets
    • 1 lb. chicken tenders
    • 1 lb. ground turkey
    • 1 bunch asparagus
    • 1 inch fresh ginger
    • 1 lb. pasta
    • 1 can chickpeas
    • 1/2 dozen eggs
    • 1 bag shredded Mexican cheese blend
I hope this guide helps you to plan your weekly meals and run a more efficient kitchen.  Let me know if you have any questions or other tips and tricks in the comments!

Wednesday, August 13, 2014

Spinach and Feta Meatballs


These delicious little turkey meatballs are one of my favorite recipes.  They are a great main dish when served with rice, cous cous, or orzo, and have been a perennial cocktail party favorite plated up in a large bowl.  I use ground turkey in this recipe and in almost every ground meat application in my kitchen, but you can feel free to use beef, a beef/pork combination, or even ground lamb for a particularly Greek inspired meal!

Start by finely dicing a small onion and letting it sauté in olive oil over medium heat.  While the onion cooks roughly chop 4-5 cups of baby spinach and add to the pan with the onions.  Add two cloves of crushed garlic, season with salt and pepper and allow the spinach to wilt and the onions to become translucent.  You may substitute a box frozen chopped spinach for the fresh spinach, but I've made it with both and really prefer the fresh spinach for its texture and flavor.


Set the spinach and onion mixture aside in a bowl and allow to cool before mixing with the raw meat.  This will take a few minutes, so feel fee to pour a glass of wine or having a little cooking break with some cheese and crackers...just me? Okay.  Speaking of cheese, I use a great Mediterranean seasoned feta from Trader Joe's, but if you can't find it plain feta will be more than sufficient.


Once your spinach and onion mixture is sufficiently room temperature combine with ground turkey, egg, feta cheese, oregano, crushed red pepper flakes, salt, and pepper.  If your mixture is very loose, which turkey sometimes can be, add some breadcrumbs to the mixture.  I've found these meatballs are much more tender without breadcrumbs so try to avoid it if you can.  So if you're impatient like me, use a spring loaded ice cream scoop to portion your meatballs and transfer them directly to the pan.  If you don't have a scoop, or have a virtuous level of patience, you can roll your meatballs by hand.  I prefer a slightly smaller meatball for this recipe because they cook more quickly and help the turkey from getting too dry.


Pan fry the meatballs in batches in a non-stick pan.  I've discovered that the non-stick pan is a meatball making essential so the cooked, caramelized part doesn't break away from the uncooked part as you flip the meatballs.  Don't worry about them becoming less spherical as you cook them.  All of my meatballs turn out kind of pyramid shaped and they remain lovely and delicious.

Spinach and Feta Meatballs
Adapted from Itsy Bitsy Foodies

Ingredients
  • 1 lb. ground turkey
  • 4-5 cups baby spinach
  • 3-4 oz. Mediterranean seasoned feta
  • 1 small onion
  • 2 cloves of garlic
  • 1 tbsp. oregano
  • 1 tsp. crushed red pepper flakes
  • 1 egg
  • Salt and pepper, to taste
  • Breadcrumbs, if needed
Instructions
  1. Finely dice onions and sauté with roughly chopped spinach and crushed garlic
  2. Let spinach mixture cool to room temperature before adding to meat
  3. Mix spinach mixture with meat and all remaining ingredients, save the breadcrumbs, until they are thoroughly combined, breaking up larger pieces of feta with your hands.
  4. If the mixture is too loose to roll add breadcrumbs until you find the desired consistency
  5. Use a spring loaded ice cream scoop or hand roll meatballs before cooking through in a non-stick pan

Tuesday, May 27, 2014

Greek Turkey Quinoa Bake and Conference Reflections


Last week I had the privilege of being a small group facilitator at the Undergraduate Interfraternity Institute (UIFI) for the second time.  If you're not familiar with this wonderful program check it out over at the NIC website.  UIFI is always a powerful experience for me, and now that I don't work directly with Greek Life it was a great way to reconnect with the roots of my career in student affairs.  My fraternity is where student affairs "happened" for me, and the work that I continue to do within the movement is really where my heart lies.  It is incredible to watch the change that occurs in the students over five days of the conference; and I truly learn from each of them in addition to my fellow facilitators.

As excited as I was to return to UIFI, I was just as excited to return to the Alpha Xi Delta house at Indiana University where Jackie Howard reigns over a truly sublime kitchen.  Jackie's food is always delicious and he personality makes eating in her kitchen a truly joyful experience.  She was also recently profiled in an Indiana Public Media article for the great work she does to locally source food for the kitchen and her commitment to cooking organic when possible.  This recipe is inspired by a dish she made the first night the facilitators arrived and it is delicious, creamy, and full of protein!


First roast the turkey tenderloins with olive oil, salt, and pepper.  You can feel free to substitute chicken breast for turkey, but definitely don't substitute ground turkey - that's not really what you're looking for.  Jackie made it with turkey though, and I really wanted to switch up the usual chicken.  After the turkey is cooked, let it cook and shred or roughly cube it.


The ratio for quinoa is the same as making rice and cous cous - 2 parts water to 1 part grain.  The difference with quinoa is that you need to rinse it in a fine mesh sieve before you add it to the water.  I cooked my quinoa in chicken broth, but you could also use salted water.


The sauce for this dish is a classic mornay sauce with parmesan and goat cheese.  Start by making a roux of equal parts butter and flour.  I add crushed garlic to the butter for this sauce.  Let your roux turn lightly golden before whisking in 2 cups of milk (I used 2% because this sauce can get a little heavy).  Bring the milk to a simmer before you add the parmesan and goat cheese.  Once the cheese has melted add the spices and keep the sauce warm on low heat until the quinoa is cooked.


Add the cooked quinoa, turkey, tomatoes, and spinach to the saucepan and stir to combine. Transfer the mixture to a greased 9x13 baking dish and cover with bread crumbs and parmesan cheese. Cook at 350 degree for 25 minutes, if its not brown enough after 25 minutes, pop on the broiler for a couple of minutes to get a nice, golden crust.


Ingredients 

  • 1 and 1/2 cups white quinoa
  • 3 cups water or chicken broth
  • 2 turkey breast tenderloins (about 1 and 1/4 lb)
  • 2 cups of milk
  • 3 oz. goat cheese (chèvre)
  • 1/2 cup parmesan cheese
  • 1 box of chopped, frozen spinach, defrosted and drained
  • 3-4 medium tomatoes, seeded
  • 1/2 cup breadcrumbs
  • Oregano
  • Parsley
  • 2 cloves of garlic
  • 1/2 tsp. cayenne pepper
  • 2 tbsp. flour
  • 2 tbsp butter


Instructions

  1. Preheat oven to 400 degrees
  2. Cover turkey breast in olive oil, salt, and pepper.  Roast on a foil covered pan for 30 minutes.
  3. Add quinoa to a pot of water or broth and bring to a boil.  Cover and simmer for 15-20 minutes,  Remove from heat and let sit for 5 minutes
  4. Shred or cube cooled turkey and dice tomatoes
  5. For the sauce, melt two tablespoons of butter in a large saucepan with two crushed cloves of garlic.  Whisk in two tablespoons of butter and keep whisking until it turns golden
  6. Add two cups of milk and whisk vigorously until it is combined and comes to a simmer
  7. When sauce begins to simmer add parmesan cheese and goat cheese, whisk in until smooth and combined
  8. Finally add oregano, parsley, cayenne pepper, and black pepper
  9. Add cooked quinoa, spinach, tomatoes, and turkey to the sauce, mix to combine
  10. Transfer quinoa mixture into a greased 9x13 baking dish and top with breadcrumbs and a little more parmesan cheese.  Bake in a 350 degree oven for 25 minutes.