Wednesday, November 5, 2014

Quick Dinner: Rigatoni with Sausage, Mushrooms, and Spinach in a Pink Sauce


There’s something about a pink sauce… The tangy, acidic tomato combined with the rich and silky cream is so luxurious.  The smooth sauce finishes with a wonderful heat that cuts through the richness and rounds out the flavor.  Needless to say, pink sauce is a big part of my life.

This recipe is an expansion on a recipe I’ve been making forever.  One day I was making the pink sauce with sausage when my roommate Christine said, “That reminds me of something I make with mushrooms and spinach.”  I thought, “Wow, that sounds even better than the original recipe” so I decided to try it out.  This also contributes to my general food philosophy, which is “more vegetables are more good.”  And yeah, I guess the heavy cream in this recipe also contributes to my overall philosophy of moderation.  Vegetables are good, and so is cream (sometimes).  The other great thing about this dinner is that it’s quick!  It took me 45 minutes from filling the pot with water to sitting down and eating this while watching The Borgias on Netflix.  It’s not necessarily the meal for a night when you have a late meeting, but it’s definitely an achievable weekday dinner.


Start by bringing a large pot of salted water to a boil and prepping the mushrooms.  There is this big urban myth that you can't wash mushrooms, and I'm here to tell you that it's just not true.  Alton Brown agrees, and made a point to mention it during his live show in Athens a couple of weeks ago.  Gone are the days of delicately brushing each mushroom with a little brush - you're welcome.  I like to put a colander in the sink and run a steady, but not too powerful, stream of cold water outside of the colander.  I quickly wash each mushroom so there is no visible dirt and place in the colander.  Place the colander next to the cutting board and trim the woody end of each stem (but don't remove the stem completely) and slice. One more quick note about mushrooms: you could use regular white button mushrooms here, but the cremini (or "baby bella") mushrooms have a more robust flavor and firmer texture that I especially appreciate for Italian dishes.


Once the mushrooms are prepped remove the sausage from the casing and brown in a little olive oil over medium heat.  Break up the sausage into bite-sized pieces as you cook and be careful to stir frequently so they do not burn.  Once fully cooked, remove the sausage from the pan and add the mushrooms, crushed red pepper flakes, dried oregano, and salt and pepper.  Cook the sausage until brown and cooked through before adding the crushed garlic (I use my favorite kitchen tool - a garlic press) and spinach.  Season the spinach with salt and pepper to build well seasoned and even layers of flavor.  Once the spinach wilts return the sausage to the pan and add one 14.5 oz can of crushed tomatoes and season with a little more salt.  Stir together and add heavy cream and bring to a simmer.  If you didn't want to add the heavy cream (which I'll grudgingly admit is a valid healthier alternative) you can use one 28 oz. can of crushed tomatoes and proceed without the cream.


Add the cooked pasta to the sauce, turn off the heat and stir until fully combined.  Serve with grated cheese, and maybe garnish with some fresh basil if you're a food blogger or you're planning to put this on Instagram.

Rigatoni with Sausage, Mushrooms, and Spinach in a Pink Sauce
Adapted from Today's Mama, and Christine Licata

Ingredients
  • 1 lb. rigatoni (or other tubular pasta)
  • 3-4 links of Italian sausage
  • 10 oz. cremini mushrooms
  • 2 cloves of garlic
  • 3-4 cups of spinach, chopped
  • 14.5 oz. crushed tomatoes
  • 1 pt. heavy cream
  • ½ tsp. crushed red pepper flakes
  • ½ tsp. oregano
  • Salt and Pepper


Instructions
  1. Bring a large pot of salted water to a boil
  2. Wash and slice mushrooms
  3. Remove sausage from casings and cook over medium heat until browned.
  4. Remove sausage from the pan and add sliced mushrooms, season with salt and pepper.  Cook until browned and cooked through.
  5. Add crushed garlic, crushed red pepper flakes, oregano, and chopped spinach to the pan and season with salt and pepper.
  6. Once spinach has wilted return the sausage to the pan and add crushed tomatoes.  Season with salt.
  7. Once tomatoes begin to simmer add heavy cream and season with black pepper. 
  8. Stir to combine until sauce begins to bubble and reduce to a simmer.
  9. Once pasta is cooked to al dente drain and add to pan.
  10. Serve with grated parmesean or romano cheese.

Tuesday, October 14, 2014

Pork and Apple Meatballs


Fall is my absolute favorite season, mostly because I feel like my fashion sense is best suited for layers.  Sweater weather hasn't exactly hit Georgia yet, but fall flavors are definitely in the markets and I'll get by on those until I can throw on a v-neck sweater and a tweed blazer.  I found this recipe for pork and apple meatballs on Pinterest a few days ago and I liked the idea but thought it needed a little bit more flavor.  Pork and apples are a classic combination and I wanted to enhance it with a wonderful savory spice combination.  I used breakfast sausage as a seasoning inspiration to bring some delicious fall flavors like sage and coriander into this meatball recipe.

Let's talk about apple selection for a minute.  For this recipe I wanted an apple that would hold up to cooking and not become an indistinguishable mush in the meatball.  I also wanted a tart and sweet flavor to contrast the rich and savory flavors of the pork and seasonings.  For this I think Pink Lady, Honeycrisp, or even Granny Smith would be great.  I'm using a Hhoneycrisp here because I couldn't find any Pink Lady apples (my personal favorite) in the store this week.  Granny Smiths are more tart than sweet, but I think they would be acceptable if you can't find another variety.  Avoid some of the softer apples like Macintosh and Red Delicious.


Start by peeling the apple (you can use a vegetable peeler or a paring knife - I use a vegetable peeler because it's faster albeit less precise).  Then cut the apple into very thin matchsticks and cut again for a fine dice.  You only need a cup of it, so that probably won't be the whole apple.  Then grate the onion over a large mixing bowl so you don't lose the onion juice.  We grate the onion here so it will cook in the meatball and you won't get any raw pieces on onion.  Combine all of the ingredients and mix until they are well combined, but be careful not to over-mix.  If the mixture feels too wet and loose add some more breadcrumbs gradually until you achieve the desired consistency.


I like to use a spring loaded ice cream scoop to portion my meatballs, and instead of hand rolling them I scoop right into the pan.  I've found meatballs rarely retain their round shape anyway, so I've stopped fighting it and started calling it rustic.  Scoop meatballs into a non-stick skillet with olive oil and take care not to overcrowd the pan.  Cook meatballs in batches and drain on a paper towel lined plate.  Don't be alarmed when you smell a lot of cinnamon as you cook the meatballs.  I started to worry that I had added too much, but it's just incredibly aromatic and won't taste like dessert, I promise!


I'm serving these meatballs with buttered egg noodles (throw in some of that fresh thyme too!) and sautéed swiss chard, which adds a beautiful ruby red color to the plate. Or, it would add a beautiful color if you got home from work in time to take pictures for your blog with natural light, but that's not always a student affairs reality.  Don't worry - it still tastes great!

Pork and Apple Meatballs
Adapted from Love Taza

Ingredients
  • 1 lb. ground pork
  • 1 cup diced tart apple such as Pink Lady, Honeycrisp, or Granny Smith
  • 1 egg
  • 1 small onion
  • 1/4 cup breadcrumbs, plus extra if needed
  • 1 tsp. fresh thyme
  • 1 tsp. ground coriander
  • 1/2 tsp. ground sage
  • 1/4 tsp. ground cinnamon
  • salt
  • pepper 

Instructions
  1. Peel apple and cut into matchsticks, cut again for a very fine dice
  2. Grate onion into bowl
  3. Combine all ingredients until they are fully mixed, but not any longer
  4. Use a spring loaded ice cream scoop to portion your meatballs to about 1.5 inches in diameter and fry in batches over medium heat until browned and cooked through, about 4 minutes
  5. Drain on a paper towel and serve with buttered noodles and sautéed greens.

Sunday, October 5, 2014

Foundations Series: What Do You Want to Learn?


I've realized that my biggest blind spot as a blogger is that I'm a pretty good cook.  A conversation earlier this semester with my friend and cohort mate Cody got me thinking about some more ideas for the blog.  Cody suggested I start a foundational series where I can address the basics of cooking and offer some accessible stepping stone recipes for beginner cooks.  I'm imagining this as being the Evans, Forney, Guido, Patton, and Renn (2010) of cooking - a overview of some basic and foundational cooking skills.

I took some of Cody's suggestions and starting brainstorming my own and came up with this  list:
  • Roasting (vegetables and poultry)
  • Sauces (bechamel, mornay, gravy, tomato, making a roux)
  • Eggs
  • Knife skills and cutting techniques (julienne, dice, chop, etc.)
  • Grains (rice, couscous, quinoa, bulgar, etc.) 

What foundational elements am I missing?  What basic recipes would you like to see? Let me know in the comments!

Saturday, September 13, 2014

#SApro Tips: Weekly Menu Planning


"I wish I could cook like you do, but I just don't plan well."

"My biggest challenge is deciding what I want to eat in advance."

"Teach me how to not eat like a toddler!"

These are some phrases I hear a lot, and it seemed to be time to share some tips and tricks on how to make menu planning and your food life a success.  We'll go through the process of menu planning and then use my actual menu from the past week as an example to show how to implement the system and make a grocery list.  Big thanks to my professor, friends and colleagues who contributed to the ideas for this post: Dr. Chris Linder, Tim Mousseau, and  Chandler Thompson (check out their blogs too)!  I hope that you find planning in advance will help you have less stress, reduce food waste, and save money.


The Process

Make it a habit:  I think the most important way to make weekly menu planning a reality is to incorporate it into your weekly ritual.  For me that means I sit down with a cup of tea and Pinterest (you can follow me on Pinterest here) every Sunday morning to create my list.  Some weeks I'll do this on Saturday if my Sunday plans prohibit me from going shopping, but it's almost always a Sunday endeavor.  Pick whatever day works best for you and stick with it.

Figure out your formula: There's no prefect formula and this will be different for everyone depending on your appetite and the size of your household unit.  I'll share what works for me and offer some amendments for you to try to have enough food for your needs.  Most people who know me know that I'm all about moderation; I generally eat pretty healthy and I'm also not too concerned with things like calories and carbs.  Especially carbs, this Italian guy loves carbs.  My rule of thumb is to have at least one vegetable with every meal, including breakfast.  With that in mind, I cook four meals a week which is enough for dinner and leftover to bring to work for lunch.  I always have pasta once a week (a self-imposed restriction because I could eat pasta every day) and one meat-free meal.  Since I don't buy anything additional for lunch this could be an easy way to make the same four meal system work in your multi-person home.  Play around with the proportions until you find what works for you.

Check your calendar:  This step is especially important for my student affairs colleagues.  With all of our late nights, programs, and after-hours meetings we need to be cognizant of what our time limitations are.  I know that on Tuesdays and Thursdays I don't get home until around 7 because of meetings for the organization that I advise so those evening have to be quick and easy dinners that don't require a lot of prep.  On Wednesday nights I have an evening class that doesn't end until 8pm, so Wednesdays are always a night for leftovers.  For the extra-busy weeks, like Welcome Week, where I have an event every evening I switch up the plan and cook a couple of big things on Sunday that will last all week. For those weeks I'll do something like a big batch of chicken enchiladas and a sausage and superfood hash.

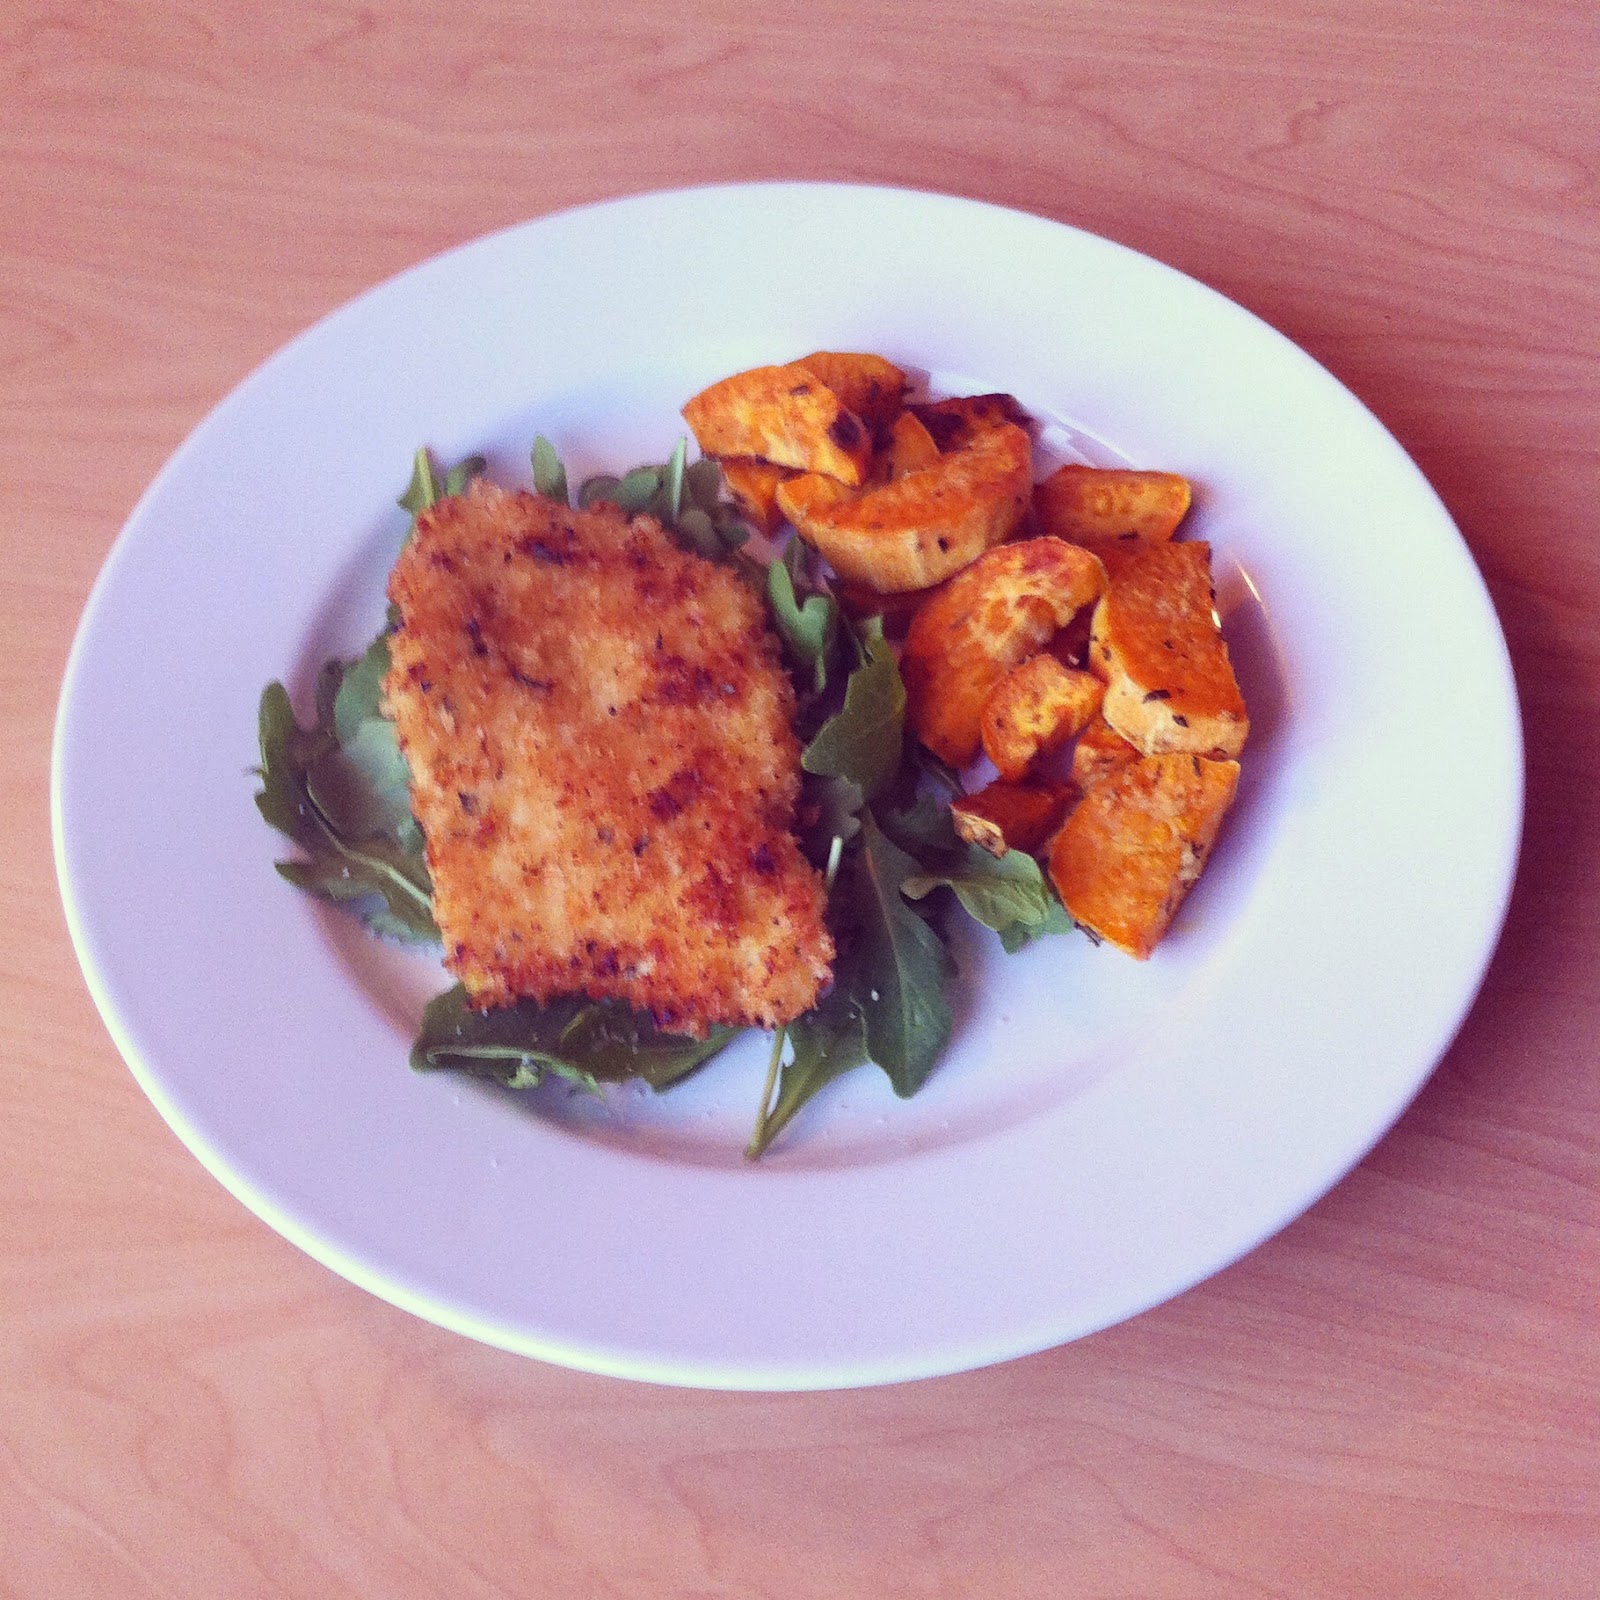
Utilize leftovers: Now that you're ready to start making a menu and list, take stock of things that are left over from last week.  I always seem to have leftover tortillas and fresh herbs.  This week I'll use the leftover tortillas to make egg and arugula quesadillas for breakfast, the leftover rosemary for the panko crusted chicken and roasted sweet potatoes, and the leftover chives for kotlety.  If you use Pinterest you can search by ingredient if you need ideas for what to do with something leftover.  You can also search "just my pins" as a way to cull the results down to things you had already shown interest in.

Look for overlapping ingredients: Similar to repurposing leftover ingredients, looking for ingredients that overlap throughout recipes is a good way to cut costs and reduce waste.  I make a point to do this whenever I'm buying bagged greens like arugula, spinach, or kale because any leftovers are unlikely to remain fresh into a second week of cooking.  This week arugula is becoming a big overlap player as a filling for my breakfast quesadillas, a bed for my panko crusted chicken, and a side salad for my kotlety.  The panko breadcrumbs will do double duty as a coating for the chicken and a filler in the kotlety.  Lemon zest will be used in the chicken coating and the juice from that lemon will be used to make the salad dressing.

Pick a splurge item: Do something good for your emotional health each week and pick a splurge item.  This could be something luxe like prosciutto, a fancy cheese, or an expensive cut of meat or something downright comforting like a frozen pizza or boxed macaroni and cheese.  Either way I think it's important to incorporate some little food items that make you happy as long as you do so in moderation.  This week I got an awesome frozen pizza from Trader Joe's, the Tarte d'Champigon (not as fancy as it sounds), and had absolutely no regrets about it. Self care, y'all!

The Menu
  • Breakfast all week: Arugula and Egg Quesadilla 
  • Sunday: Lemon Rosemary Chicken (from The Country Chic Cottage) and Roasted Sweet Potatoes


  • Tuesday: Chicken and Asparagus Stir Fry (from Skinny Taste)

  • Wednesday: Leftovers
  • Thursday: Pasta with Roasted Cauliflower, Broccoli, and Chickpeas (from Buzzfeed)


The List(s)

Each week I go to both Kroger and Trader Joe's.  I love Trader Joe's and find that some produce items like mushrooms and bagged greens are much cheaper there (organic spinach for $1.99, what?!).  Other TJ's items are simply much better quality.  I get everything else from Kroger.  The two stores are across the the street from each other so going to both is not much of a hassle, but all of these items would be available at your grocery store.  Please note that these lists are not exhaustive of everything you would need to make all of the dishes for this week.  The lists do not include things like rice, pasta, oil, spices, and seasonings that I always have in the house so take stock before you go shopping!
  • Trader Joe's
    • 1 head fresh broccoli
    • 1 head fresh cauliflower
    • 1 lemon
    • 1 bag arugula
    • 1 package white button mushrooms
    • 4 apples (for snacks)
    • 3 sweet potatoes
    • panko breadcrumbs
    • frozen pizza
    • smoked gouda cheese (for snacks)
  • Kroger
    • 1 lb. chicken cutlets
    • 1 lb. chicken tenders
    • 1 lb. ground turkey
    • 1 bunch asparagus
    • 1 inch fresh ginger
    • 1 lb. pasta
    • 1 can chickpeas
    • 1/2 dozen eggs
    • 1 bag shredded Mexican cheese blend
I hope this guide helps you to plan your weekly meals and run a more efficient kitchen.  Let me know if you have any questions or other tips and tricks in the comments!

Tuesday, August 26, 2014

Farm to Fork Challenge! Tomato and Okra Stew


This weekend Colleen, a wonderful friend from my cohort, and I took on a farm to fork challenge with the most beautiful tomatoes and okra from Colleen's friend Becca's farm.  The vegetables were so incredibly fresh and delicious, so Colleen and I wanted to do something pretty simple that would let them shine.  The combination of tomatoes and okra made us think of gumbo, and we used a gumbo recipe as a very (very) loose base, but this is definitely more of a light, brothy, summery stew than a traditional gumbo and I'm sure my friends from Louisiana would be very upset if I called this a gumbo.  Neither Colleen nor I had cooked with raw okra before so we dove in headfirst and hoped for the best.


We started by dicing the tomatoes and half of a large onion and slicing the okra into small rounds, discarding the stem and the tip.  Then we sautéed the onions until they were almost translucent and added two cloves of crushed garlic and the sliced okra.  Season with salt and pepper.  Many people say they don't like okra because it's slimy and this is true if you don't cook it long enough.  Colleen and I were legitimately concerned when the okra started emitting gooey, gelatinous strands and stuck together (see below).  Our recipe said to cook the okra for 10-12 minutes or until all of the slime is gone so we forged ahead and probably cooked them just a little bit longer than that until they looked normal and slime-free again.  


Once the okra has cooked through add the tomatoes and season them with salt and pepper.  Allow the tomatoes to cook down for a few minutes before adding water, vegetable stock, or seafood stock.  You can make your own seafood stock if you buy shell-on shrimp and you have all the time in the world (i.e. you don't work in student affairs).  I found this recipe from my spirit animal, Ina Garten: http://www.foodnetwork.com/recipes/ina-garten/seafood-stock-recipe.html.  If you use water add a little bit more salt and pepper.  Season liberally with tobacco sauce and bring to a simmer.  Once the stew comes to a simmer add the peeled, deveined, and seasoned shrimp and cook until they are just done and in the shape of a C (never and O).  Serve your stew over rice.


Quick side note on rice:  Many people find cooking rice challenging, but this simple method has never steered me wrong.  Use two cups of water for every one cup of white rice, this recipe can be increased infinitely - I made five cups of rice for a organization retreat and it still cooked perfectly.  Pour two cups of water into a small saucepan and add some salt and a tablespoon of butter.   Bring the water to a boil, add one cup of rice, reduce heat to a simmer (on an electric stove I've found that just above low is the best temperature) and cook for 22 minutes covered.  After 22 minutes uncover and fluff with a fork.  You can omit the salt and use any kind of broth.  If you're using brown rice read the package for directions because it will take significantly longer to cook.

Enjoy this recipe with friends and a cold beer like Colleen and I did - after a long summer internship it was great to be back in Athens with all the great people in my cohort!


Tomato and Okra Stew

Ingredients
  • 5 roma or plum tomatoes
  • 3 cups of sliced fresh okra
  • Half of a large onion
  • 2 cloves of garlic
  • 3 cups of water or vegetable, or seafood stock
  • Tabasco sauce, lots of it (or to taste)
  • 1 lb. of raw shrimp, peeled, deveined, and seasoned with salt and pepper
  • 2 cups of uncooked white rice
  • 4 cups of water
  • 2 tbsp. butter
Instructions
  1. Dice onion and tomatoes and slice okra.
  2. Sauté onion until translucent, add okra and crushed garlic and season with salt and pepper
  3. Cook 10-12 minutes, or until all okra is no longer slimy
  4. Add tomatoes and season with salt and pepper, cook for 3 minutes
  5. In a separate pan bring water, butter and salt to a boil, add rice, reduce to a simmer, and cook covered for 22 minutes.
  6. Add water or stock and tabasco sauce and bring to a simmer
  7. Add raw shrimp and allow it to cook in the strew (about three minutes)
  8. Serve over cooked rice.


Wednesday, August 13, 2014

Spinach and Feta Meatballs


These delicious little turkey meatballs are one of my favorite recipes.  They are a great main dish when served with rice, cous cous, or orzo, and have been a perennial cocktail party favorite plated up in a large bowl.  I use ground turkey in this recipe and in almost every ground meat application in my kitchen, but you can feel free to use beef, a beef/pork combination, or even ground lamb for a particularly Greek inspired meal!

Start by finely dicing a small onion and letting it sauté in olive oil over medium heat.  While the onion cooks roughly chop 4-5 cups of baby spinach and add to the pan with the onions.  Add two cloves of crushed garlic, season with salt and pepper and allow the spinach to wilt and the onions to become translucent.  You may substitute a box frozen chopped spinach for the fresh spinach, but I've made it with both and really prefer the fresh spinach for its texture and flavor.


Set the spinach and onion mixture aside in a bowl and allow to cool before mixing with the raw meat.  This will take a few minutes, so feel fee to pour a glass of wine or having a little cooking break with some cheese and crackers...just me? Okay.  Speaking of cheese, I use a great Mediterranean seasoned feta from Trader Joe's, but if you can't find it plain feta will be more than sufficient.


Once your spinach and onion mixture is sufficiently room temperature combine with ground turkey, egg, feta cheese, oregano, crushed red pepper flakes, salt, and pepper.  If your mixture is very loose, which turkey sometimes can be, add some breadcrumbs to the mixture.  I've found these meatballs are much more tender without breadcrumbs so try to avoid it if you can.  So if you're impatient like me, use a spring loaded ice cream scoop to portion your meatballs and transfer them directly to the pan.  If you don't have a scoop, or have a virtuous level of patience, you can roll your meatballs by hand.  I prefer a slightly smaller meatball for this recipe because they cook more quickly and help the turkey from getting too dry.


Pan fry the meatballs in batches in a non-stick pan.  I've discovered that the non-stick pan is a meatball making essential so the cooked, caramelized part doesn't break away from the uncooked part as you flip the meatballs.  Don't worry about them becoming less spherical as you cook them.  All of my meatballs turn out kind of pyramid shaped and they remain lovely and delicious.

Spinach and Feta Meatballs
Adapted from Itsy Bitsy Foodies

Ingredients
  • 1 lb. ground turkey
  • 4-5 cups baby spinach
  • 3-4 oz. Mediterranean seasoned feta
  • 1 small onion
  • 2 cloves of garlic
  • 1 tbsp. oregano
  • 1 tsp. crushed red pepper flakes
  • 1 egg
  • Salt and pepper, to taste
  • Breadcrumbs, if needed
Instructions
  1. Finely dice onions and sauté with roughly chopped spinach and crushed garlic
  2. Let spinach mixture cool to room temperature before adding to meat
  3. Mix spinach mixture with meat and all remaining ingredients, save the breadcrumbs, until they are thoroughly combined, breaking up larger pieces of feta with your hands.
  4. If the mixture is too loose to roll add breadcrumbs until you find the desired consistency
  5. Use a spring loaded ice cream scoop or hand roll meatballs before cooking through in a non-stick pan

Friday, August 8, 2014

Fried Artichoke Salad and Summer Internship Reflection


I just got back from a wonderful summer in St. Louis working with the First Year Center at Washington University in St. Louis.  I loved being at Wash. U. and in St. Louis for the summer and wanted to share this recipe for a great salad I had at Katie's Pizza.

Now it's pretty rare for me to get excited about a salad and I generally don't view salad as the main part of a meal, but this salad is really wonderful and substantial enough to be a complete meal.  Take the time to roast the asparagus ahead of time, preferable to use in another meal during the week.  I always seem to have a few leftover asparagus and this is the perfect place to use them.  Look for thin asparagus for this application and save thicker asparagus for stir fries and purees.

Lightly dredge halved artichoke hearts in the seasoned flour and fry to a golden brown in oil.  I used canned artichoke hearts, but you could also use fresh or frozen.  While the artichokes fry arrange greens (I used a spring mix), asparagus, crumbles of goat cheese, and pistachios.  Top the salad with fried artichokes and drizzle with balsamic vinegar and olive oil.  You could make a real dressing by whisking it all together, but I was feeling artistic/lazy and just drizzled the dressing over the salad and it was just fine.

Fried Artichoke Salad


Ingredients (per salad)
  • 2 artichoke hearts, halved
  • flour
  • 4-5 spears of roasted asparagus
  • 2 cups of mixed greens
  • 1 oz. goat cheese
  • 2 tbsp. pistachios
  • 1 tbsp. balsamic vinegar
  • 2 tbsp. olive oil

Instructions
  1. Lightly dredge halved artichokes in flour seasoned with salt and pepper
  2. Fry artichokes to a golden brown in oil
  3. While artichokes fry, add salad greens, asparagus, pistachios and goat cheese to bowl
  4. When artichokes are golden brown transfer them to a paper towel lined plate and allow them to drain before transferring to the salad
  5. Drizzle salad with oil and vinegar and serve immediately.