Sunday, July 6, 2014

Quick Dinner: Marinara Sauce


I've hesitated to add this recipe to the blog for a long time - not because it tastes bad or anything, but because it seems too easy to actually be a recipe.  After numerous requests to add a marinara sauce to the blog I realized that not everyone has a wonderful Italian mother who whips up this sauce when she doesn't have time to make "real" sauce.  With that in mind it translates to a perfect quick dinner for a #SApro because it will be finished in the time it takes to boil water and cook pasta.  Even better is that it lends itself to a bunch of second round recipes for later in the week like chicken parmesan, meatball heroes, pizza, stromboli, etc.

Coat the bottom of a large pot or dutch oven with olive oil and bring to medium heat.  Use your garlic press to crush two large cloves of garlic and add them to the pot with crushed red pepper flakes.  Feel free to add more or less red pepper flakes based on your preference - add more if you're serving this with seafood! Let the garlic cook for a minute or two, being careful not to let it brown, then quickly add the red wine.  Use any red wine that you have open and around the house.  For me that means its most likely a cabernet sauvignon or a shiraz, but any red will do.  My non-drinking friends can skip this step without worry.


Once the wine has reduced, about two minutes, add the crushed tomatoes and the small can of tomato sauce.  Be careful not to use sauce with seasoning - we're taking care of that ourselves. Add salt and stir the sauce together.  Bring to a rolling boil before you add the fresh basil and simmer semi-covered for 20 minutes.

Marinara Sauce

Ingredients

  • 28 oz. can of crushed tomatoes
  • 8 oz. can of plain tomato sauce
  • 2 cloves of garlic
  • 1/4 cup of red wine
  • 2 tbsp. fresh basil, chopped
  • 1 tsp. salt
  • 1 tsp. crushed red pepper flakes


Instructions

  1. Coat the bottom of a small pot in olive oil and bring to medium heat
  2. Add crushed garlic and red pepper flakes, cook for 1-2 minutes
  3. Add red wine and let it reduce, about two minutes
  4. Add tomatoes and salt, stir, and bring to a boil
  5. Add fresh basil and let simmer covered for 20 minutes

Sunday, June 15, 2014

Quick Dinner: Pork Milanese with Arugula Salad


There's something about a hot, breaded pork cutlet topped with a cold, tangy salad that I can't get enough of.  The pork brings me back to when I lived in Iowa, where an Iowa pork tenderloin is truly a special experience.  What's even better is that it's such a quick dinner to throw together - about 30 minutes!  This is a great meal for when you're getting home from work just a little bit later than you'd hoped to...


Start by setting up your breading station: pork cutlets, two beaten eggs, breadcrumb plate, empty plate.  Keep some breadcrumbs on hand in case you need more than two cups.  Dip your cutlets in egg, than in seasoned breadcrumbs carefully coating each cutlet completely.  Some people also add flour to this menthol before the egg, but my mother never did that so I haven't bothered.  I also use this method to bread chicken cutlets that I've  very thinly pounded.


The irregular little croquette you see on the plate is what my family calls a bread ball.  Thrifty Italian ancestors refused to waste the leftover egg and breadcrumbs from coating the meat, so they would mix them together to form a croquette that's fried alongside the cutlets.  It's a delicious treat for the cook!


Once the pork has been breaded liberally coat a pan with oil and heat over medium-high.  I prefer vegetable or corn oil for frying because olive oil has a very low smoke point.  Peanut oil is also good for frying, albeit not allergen free.  Cook for 2-3 minutes on each side until the pork has browned and cooked through.


While the pork cooks mix together your salad dressing: lemon juice, olive oil, dijon mustard, salt and pepper.  Whisk vigorously until it is emulsified and let it sit until just before serving.  Once the pork is cooked through add arugula and pecorino romano (or parmesan) cheese to the salad dressing, toss, and top pork cutlets.


Pork Milanese with Arugula Salad

Ingredients
  • 1 lb pork cutlets (may be labeled pork cube steak, or pork tenderloin)
  • 2 eggs
  • 2 cups seasoned breadcrumbs
  • 4 oz. arugula
  • Juice of half a lemon
  • 1/4 cup of olive oil
  • 2 tbsp. dijon mustard
  • 1/4 cup pecorino romano (or parmesan) cheese

Instructions
  1. Bread pork cutlets by dipping in beaten eggs and coating in breadcrumbs.
  2. Fry pork over medium-high heat for 2-3 minutes per side
  3. Meanwhile, vigorously whisk oil, lemon juice, mustard, salt, and pepper until the mixture emulsifies.
  4. Toss arugula and pecorino romano with salad dressing and top cooked pork cutlets.

Saturday, June 7, 2014

Make Ahead Meal: Tomato Basil Quiche


This summer I'm doing a NODA internship at Washington University in St. Louis (WUSTL).  The schedule for days when we have orientation sessions is tight, so taking time to cook is going to be on the back burner.  When I get busy I like to lean on some good make ahead meals like this quiche.  Make it on a Sunday afternoon and you can have it for breakfast all week, or have it for dinner with a salad.  You can also use this recipe as a base and add whatever ingredients you like - tomato and basil is perfect for the summer though!


Start by poking some holes in the bottom of the pie crust with the tines of a fork.  You could make your own pie crust, but I feel like that defeats the purpose of a time saving meal...  It will be delicious either way.


Next slice the tomato crosswise to maximize the surface area and make it look pretty.  Shred the cheese and cut the basil into a chiffonade.  Start with a layer of cheese, then tomato, then basil and repeat.  Top this off with a final layer of cheese and basil.  Pour four whisked eggs, heavy cream, salt, and pepper into the pie crust.  Bake at 350 for forty minutes.


This really isn't that hard - most of the time spent making it is not actively cooking so it makes a great time saving recipe.  Here are some of my other favorite quiche fillings:

  • Turkey sausage, green chiles, and a mexican cheese blend
  • Bacon, apple, caramelized onions, and swiss cheese
  • Spinach, diced tomato, and feta cheese
  • Asparagus and goat cheese


Tomato Basil Quiche

Ingredients

  • 1 frozen pie crust
  • 4 eggs
  • 2 tbsp. heavy cream
  • 1 and 1/4 cups of shredded smoked gouda
  • 5 large basil leaves
  • 1 beefsteak tomato 

Instructions

  1. Preheat oven to 350 degrees
  2. Thinly slice 1 large tomato crosswise, about 1/8th of an inch thick
  3. Use a fork to poke holes in the bottom of the pie crust
  4. Layer cheese, tomato, and basil (in that order) in the pie crust twice.
  5. Add a final layer of cheese and basil to the top of the pie crust
  6. Beat four eggs with 2 tbsp. heavy cream, salt, and pepper and pout over the tomato and cheese layers
  7. Bake on a foil lined sheet pan for 40 minutes, or until a knife comes cleanly out of the center

Tuesday, May 27, 2014

Greek Turkey Quinoa Bake and Conference Reflections


Last week I had the privilege of being a small group facilitator at the Undergraduate Interfraternity Institute (UIFI) for the second time.  If you're not familiar with this wonderful program check it out over at the NIC website.  UIFI is always a powerful experience for me, and now that I don't work directly with Greek Life it was a great way to reconnect with the roots of my career in student affairs.  My fraternity is where student affairs "happened" for me, and the work that I continue to do within the movement is really where my heart lies.  It is incredible to watch the change that occurs in the students over five days of the conference; and I truly learn from each of them in addition to my fellow facilitators.

As excited as I was to return to UIFI, I was just as excited to return to the Alpha Xi Delta house at Indiana University where Jackie Howard reigns over a truly sublime kitchen.  Jackie's food is always delicious and he personality makes eating in her kitchen a truly joyful experience.  She was also recently profiled in an Indiana Public Media article for the great work she does to locally source food for the kitchen and her commitment to cooking organic when possible.  This recipe is inspired by a dish she made the first night the facilitators arrived and it is delicious, creamy, and full of protein!


First roast the turkey tenderloins with olive oil, salt, and pepper.  You can feel free to substitute chicken breast for turkey, but definitely don't substitute ground turkey - that's not really what you're looking for.  Jackie made it with turkey though, and I really wanted to switch up the usual chicken.  After the turkey is cooked, let it cook and shred or roughly cube it.


The ratio for quinoa is the same as making rice and cous cous - 2 parts water to 1 part grain.  The difference with quinoa is that you need to rinse it in a fine mesh sieve before you add it to the water.  I cooked my quinoa in chicken broth, but you could also use salted water.


The sauce for this dish is a classic mornay sauce with parmesan and goat cheese.  Start by making a roux of equal parts butter and flour.  I add crushed garlic to the butter for this sauce.  Let your roux turn lightly golden before whisking in 2 cups of milk (I used 2% because this sauce can get a little heavy).  Bring the milk to a simmer before you add the parmesan and goat cheese.  Once the cheese has melted add the spices and keep the sauce warm on low heat until the quinoa is cooked.


Add the cooked quinoa, turkey, tomatoes, and spinach to the saucepan and stir to combine. Transfer the mixture to a greased 9x13 baking dish and cover with bread crumbs and parmesan cheese. Cook at 350 degree for 25 minutes, if its not brown enough after 25 minutes, pop on the broiler for a couple of minutes to get a nice, golden crust.


Ingredients 

  • 1 and 1/2 cups white quinoa
  • 3 cups water or chicken broth
  • 2 turkey breast tenderloins (about 1 and 1/4 lb)
  • 2 cups of milk
  • 3 oz. goat cheese (chèvre)
  • 1/2 cup parmesan cheese
  • 1 box of chopped, frozen spinach, defrosted and drained
  • 3-4 medium tomatoes, seeded
  • 1/2 cup breadcrumbs
  • Oregano
  • Parsley
  • 2 cloves of garlic
  • 1/2 tsp. cayenne pepper
  • 2 tbsp. flour
  • 2 tbsp butter


Instructions

  1. Preheat oven to 400 degrees
  2. Cover turkey breast in olive oil, salt, and pepper.  Roast on a foil covered pan for 30 minutes.
  3. Add quinoa to a pot of water or broth and bring to a boil.  Cover and simmer for 15-20 minutes,  Remove from heat and let sit for 5 minutes
  4. Shred or cube cooled turkey and dice tomatoes
  5. For the sauce, melt two tablespoons of butter in a large saucepan with two crushed cloves of garlic.  Whisk in two tablespoons of butter and keep whisking until it turns golden
  6. Add two cups of milk and whisk vigorously until it is combined and comes to a simmer
  7. When sauce begins to simmer add parmesan cheese and goat cheese, whisk in until smooth and combined
  8. Finally add oregano, parsley, cayenne pepper, and black pepper
  9. Add cooked quinoa, spinach, tomatoes, and turkey to the sauce, mix to combine
  10. Transfer quinoa mixture into a greased 9x13 baking dish and top with breadcrumbs and a little more parmesan cheese.  Bake in a 350 degree oven for 25 minutes.

Monday, May 12, 2014

Sweet Potato Fries


I've talked about it before, but I really love sweet potatoes.  They're so rich in nutrients, and now that I've got over the sugar shock of their Thanksgiving preparation sweet potatoes make frequent appearances on my table.  I love baking these fries with a lot of seasoning combinations, but this blend of cumin, paprika, and cinnamon is one of my favorites.

You have to take a couple of steps to make these fries crispy.  The first is cutting them fairly thinly.  More surface area means more crispiness.  I like to look for longer, less squat sweet potatoes when I make fries.  Make sure you're using a sharp knife for this - cutting into a raw sweet potato can be difficult and a blunt knife can make it dangerous.  I like to skin the sweet potatoes before cutting them, but that's a personal preference.  Scrub them very well if you decide not to skin them.


Once you've sliced the potatoes submerge them in a bowl of cold water for at least an hour. This helps to remove some of the starch, which is another way to make them crispy.  When you remove them from the water rise them off to remove the any additional starch and pat them completely dry.  Lay them on a foil lined sheet pan, and make sure the potatoes have enough room to be spread in a single layer.  Use two pans if necessary.


Bake the fries at 450 degrees for 20-30 minutes on the lowest rack of the oven.  Flip them halfway through the cooking time to ensure maximum crisp.

If you have any leftovers let them cool completely before you store them so they don't get soggy, and reheat them in the oven.


Sweet Potato Fries

Ingredients

  • 3 medium sweet potatoes
  • 2 tbsp. olive oil
  • 1/2 tsp. cumin
  • 1/4 tsp. paprika
  • 1/4 tsp. cinnamon
  • Salt and Pepper

Instructions

  1. Preheat oven to 450 degrees
  2. Slice sweet potatoes in half and slice lengthwise into fries
  3. Soak potatoes in water for at least 1 hour
  4. Drain and rinse potatoes and dry them completely
  5. Place potatoes on a foil lined sheet pan and coat with oil, spices, and salt and pepper
  6. Bake potatoes for 20-30 minutes, and flip halfway through cooking time

Saturday, May 3, 2014

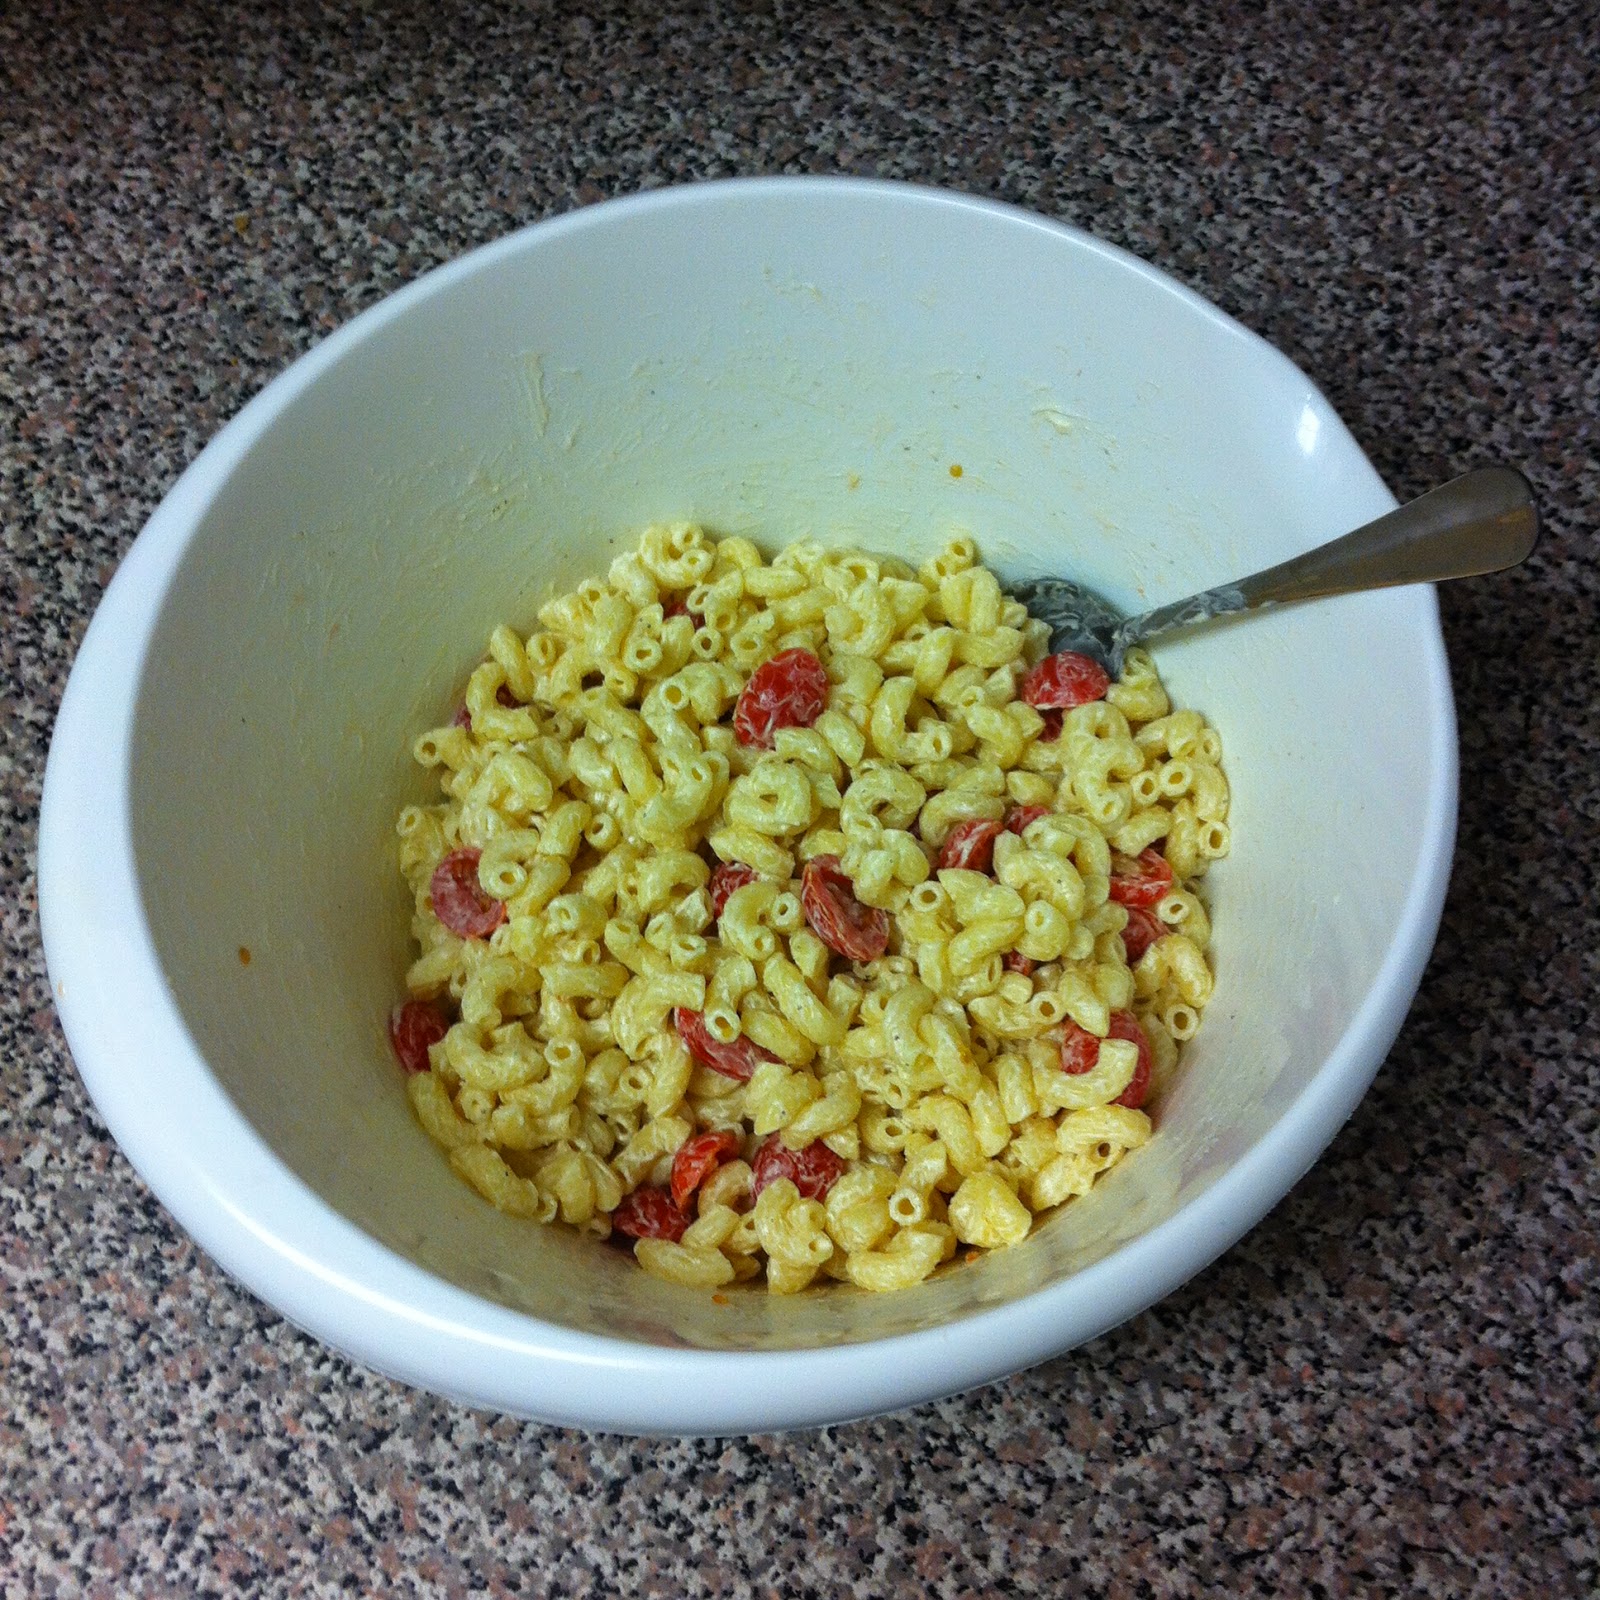
Classic Macaroni Salad


I just finished my last final, so it is officially the summer!  It's also the time of year when those end of the year potlucks start to pop up all over Student Affairs, so I think the perfect marriage of summer and potluck is my mom's macaroni salad.

When I was writing this post I kept thinking of ways to "improve" this recipe.  Grated onion, I thought, would be a great addition to my mom's recipe and then I realized that the point of this recipe was to be easy and deliciously simple.  As a cook and a blogger it was tempting to dress this recipe up, but it didn't need any extraneous ingredients to shine.  With that in mind I cut out all of the extras and made it just like my mom does.


First bring a large pot of salted water to a boil and cook half a pound of elbow noodles until they are al dente.  Drain the cooked pasta and add to a bowl with 1/4 cup of white vinegar.  Stir occasionally while the pasta cools slightly, and once it is moderately cool, cover loosely with parchment or wax paper and put in the refrigerator to finish cooling.  Don't put tin foil or plastic wrap over it - you don't want to stop heat from escaping and cook the pasta more.

While the pasta is cooling place one egg in a small saucepan and cover with cold water.  Bring the saucepan to a boil and set a time for 15 minutes. After 15 minutes, run cold water over the saucepan and let the egg sit in the cook water for a few minutes.  Crack and peel the egg while it is still lukewarm and place it in the refrigerator to cool.  My mom doesn't always add the hard boiled eggs, so feel free to omit them if you're just not a fan.  I promise it will still taste great!


After the pasta and egg have cooled for at least an hour, remove them from the refrigerator. Add the very finely diced hard boiled eggs, halved grape tomatoes, mayo, salt and pepper to the pasta and stir to combine.  The amount of mayonnaise is really about personal preference, so I would add 3/4 of a cup first and then see if it needs more.  Taste to check the seasoning and add more salt or pepper if necessary.  Refrigerate until you're ready to enjoy!

Classic Macaroni Salad

Ingredients
  • 1/2 lb. of elbow macaroni
  • 1/4 cup white vinegar
  • 2 cups grape tomatoes
  • 1 egg
  • 3/4 - 1 cup mayonnaise
  • Salt and Pepper

Instructions
  1. Bring a large pot of salted water to a boil and cook pasta until al dente
  2. Drain the cooked pasta and coat with 1/4 cup of white vinegar, stirring occasionally until it is cool enough to refrigerate
  3. Put one egg in a small saucepan and cover with water.  Bring to a boil and cook for 15 minutes
  4. After 15 minutes, run cold water over the saucepan and egg, and allow to cool for 5 minutes in the lukewarm water.  Remove and peel the shell from the egg, refrigerate
  5. After the pasta and hard-boiled egg have cooled for at least an hour, very finely dice the egg, slice grape tomatoes lengthwise and add to pasta
  6. Add 3/4 cup of mayonnaise to the pasta and season with salt and pepper, stir.  If the pasta seems to dry add the final 1/4 cup of mayonnaise
  7. Refrigerate before serving

Monday, April 14, 2014

Self Care: Fettuccine with Arugula Pesto and Crispy Shrimp


I think we've come to the time of the semester where we all really need some self care.  This semester in my masters program we have an extra eleven hours a week in practicum which means a lot less time.  We're stressed, and we're really ready for summer.  With this in mind I thought it would be time for another self care recipe, and you can bet that means some pasta and heavy cream!  Next time I do a self care recipe maybe I'll avoid pasta. Maybe.


Despite being a creamy dish, the arugula pesto is light and refreshing - perfect for spring!  I think you'll enjoy its spicy, garlicky flavor in a lot of applications.  My roommate and I have already resolved to spread it on french bread, add more cheese and bake it in the oven.  I also want to try it stuffed in a chicken breast with sun dried tomatoes and feta.


Making the pesto is easy - simply combine the arugula, almonds, cheese, garlic, and olive oil in the bowl of the food processor and blend.  Make sure you toast the almonds in a dry pan before adding them to the pesto.  This will bring out a fully developed almond flavor.  I use pecorino romano cheese because it's what my Southern Italian family uses, but you can use parmesan if that's what you have.  (Mini Italian history lesson - cows are not able to graze in Southern Italy, but sheep are abundant there.  That's why many southern Italians use pecorino, a sheep's milk cheese, versus parmesan which is a cow's milk cheese.)  If you plan on using the pesto as a sauce on it's own, without the cream, slowly drizzle in more olive oil to make it a bit more like a sauce and less like a paste.  Combine the pesto with the cream and set it aside.


Next fry your shrimp.  Season your flour with salt, pepper, garlic powder, and paprika.  Pat your shrimp dry with a paper towel and dredge it in the seasoned flour.  Brown the shrimp in oil over medium-high.  It should not take more than two minutes on each side, so keep an eye on the shrimp!  Remember, when the shrimp is C shaped it's cooked, when it's O shaped it's overcooked.  Once the shrimp is cooked put it on a paper towel lined dish to drain,


Once your pasta is cooked al dente add the sauce and shrimp and serve with some more grated pecorino romano cheese!


Fettuccine with Arugula Pesto and Crispy Shrimp
Adapted from How Sweet It Is

Ingredients
  • 4 oz. of arugula (approx. 1/3 of a bag)
  • 1/3 cup of grated pecorino romano or parmesan cheese
  • 2 cloves of garlic
  • 1/3 cup of raw, slivered almonds, toasted
  • 1/2 cup of olive oil
  • 1/2 pint of heavy cream
  • 1 lb. fettuccine
  • 1 lb. shrimp, peeled and deveined
  • 3 tbsp. flour
  • 1/2 tsp. garlic powder
  • 1/2 tsp. paprika
  • salt and pepper

Instructions
  1. Bring a large pot of salted water to a boil, and cook fettuccine until al dente
  2. In a dry pan, toast almonds for a three minutes, stirring occasionally until they become fragrant
  3. Combine arugula, cheese, almonds, garlic, and olive oil in the bowl of a food processor and blend
  4. In a bowl mix the arugula pesto with the heavy cream and set aside
  5. Season the flour with garlic powder, salt, and pepper and dredge the shrimp in the flour - make sure the shrimp is completely dry before you dredge it
  6. Brown the shrimp on each side in olive oil in a skillet on medium-high.  The shrimp will cook quickly, it should not take more than two minutes on each side
  7. Toss the sauce with the cooked pasta and the shrimp